Deploy NIM Model
Overview
This guide walks you through deploying an NVIDIA NIM model from Bridge model catalog. NVIDIA NIM (NVIDIA Inference Microservices) provides pre-optimized, GPU-accelerated inference containers for popular AI models (e.g., meta/llama-3.2-3b-instruct, nvidia/llama-3.1-nemotron-70b-instruct). Bridge pulls the NIM container, serves it on GPU infrastructure, and exposes it via an endpoint for inference.
This guide covers:
- Selecting a NIM model from the catalog and starting deployment
- Configuring the model name, endpoint, GPU type and count, and rate limits
- Providing NVIDIA NGC credentials (if required)
- Monitoring deployment until the model is running
Prerequisites
- Tenant Admin access — You must log in as a Tenant Admin to deploy models from the catalog.
- Model catalog — The NIM model you want to deploy must be available in Bridge model catalog. The Available Models tab lists all deployable models. If the model you need is not listed, contact your Bridge Super Administrator to add it.
- Endpoint — You may need to create or select an NIM endpoint before or during deployment.
- NVIDIA NIM API key — NIM models are distributed through NVIDIA NGC. You need an NVIDIA NIM API key to pull the model container. Have your key ready.
note
If you do not have an NVIDIA NIM API key, follow these steps to create one:
- Go to https://ngc.nvidia.com/ and sign in (or sign up for a free account).
- Click your user icon in the top-right corner.
- Select Setup.
- In the Setup page, click Generate API Key.
- Click Confirm to generate a new key. Copy and save it — the key is shown only once.
Deploy Model
Step 1: Select Model
- Log in to Bridge as a Tenant Admin.
- In the left sidebar, open Models.
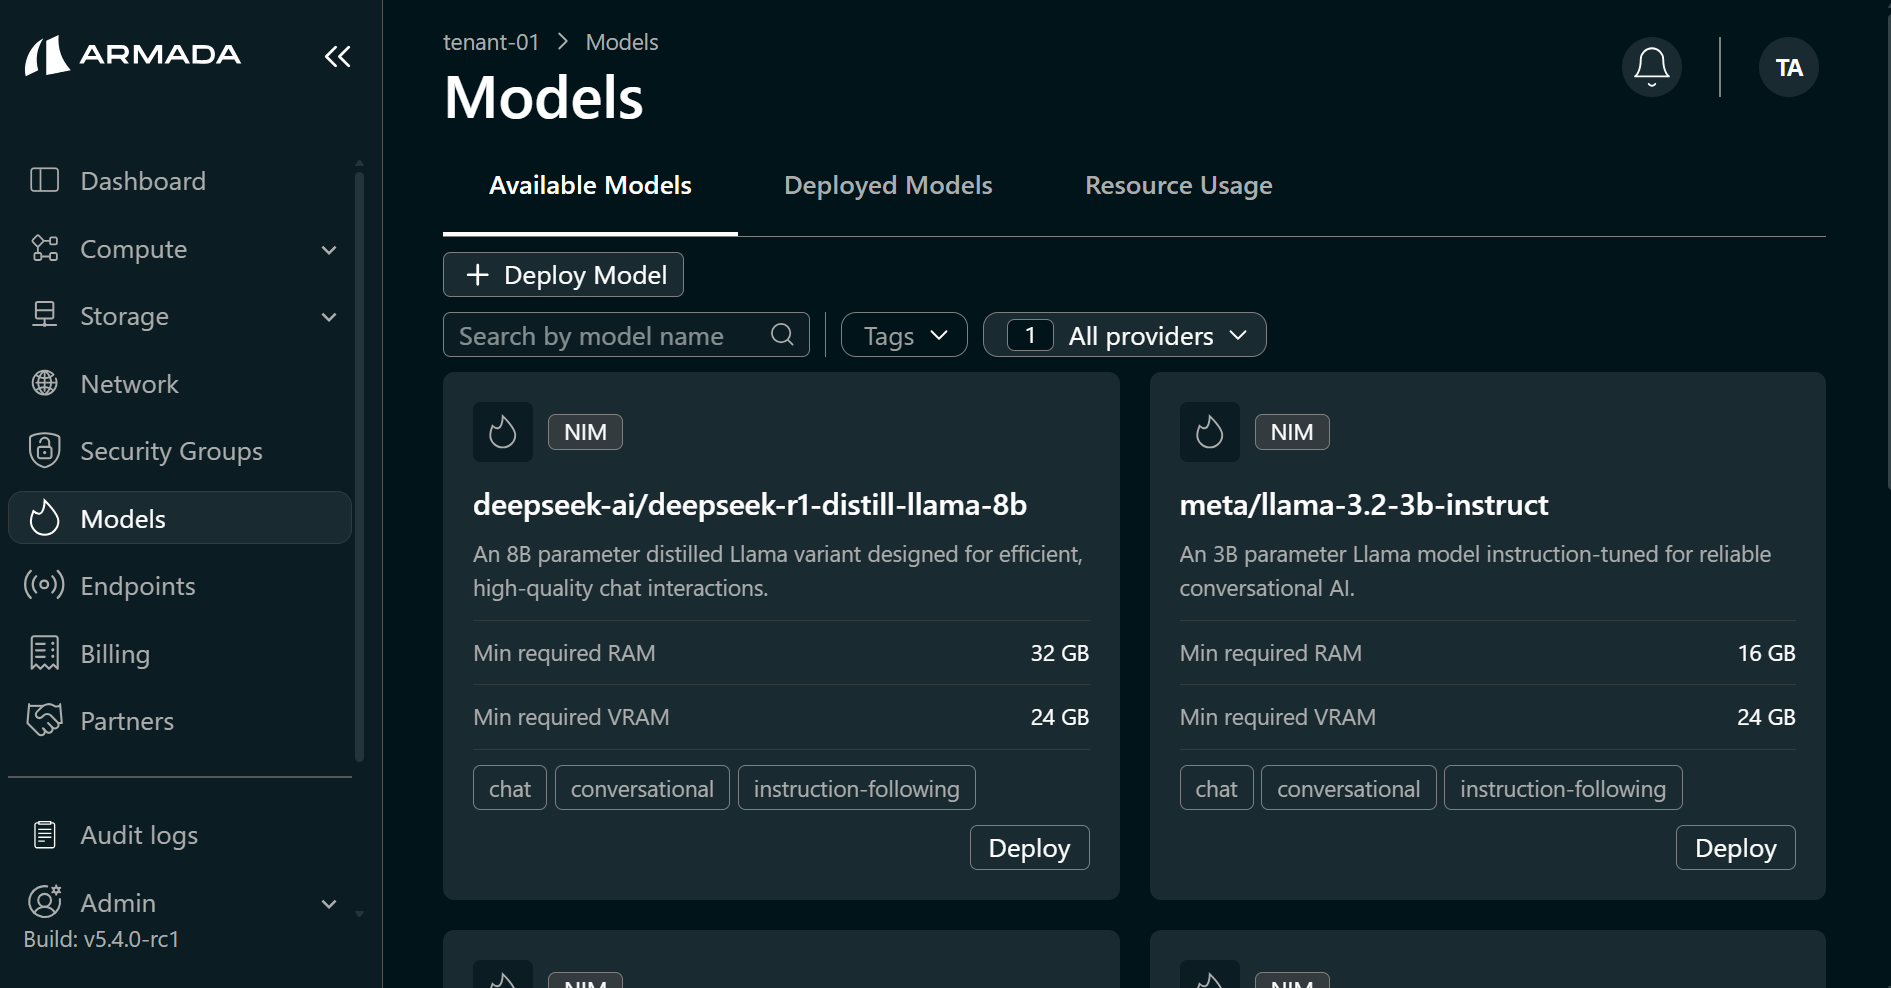
- Open the Available Models tab. All catalog models available for deployment are listed.
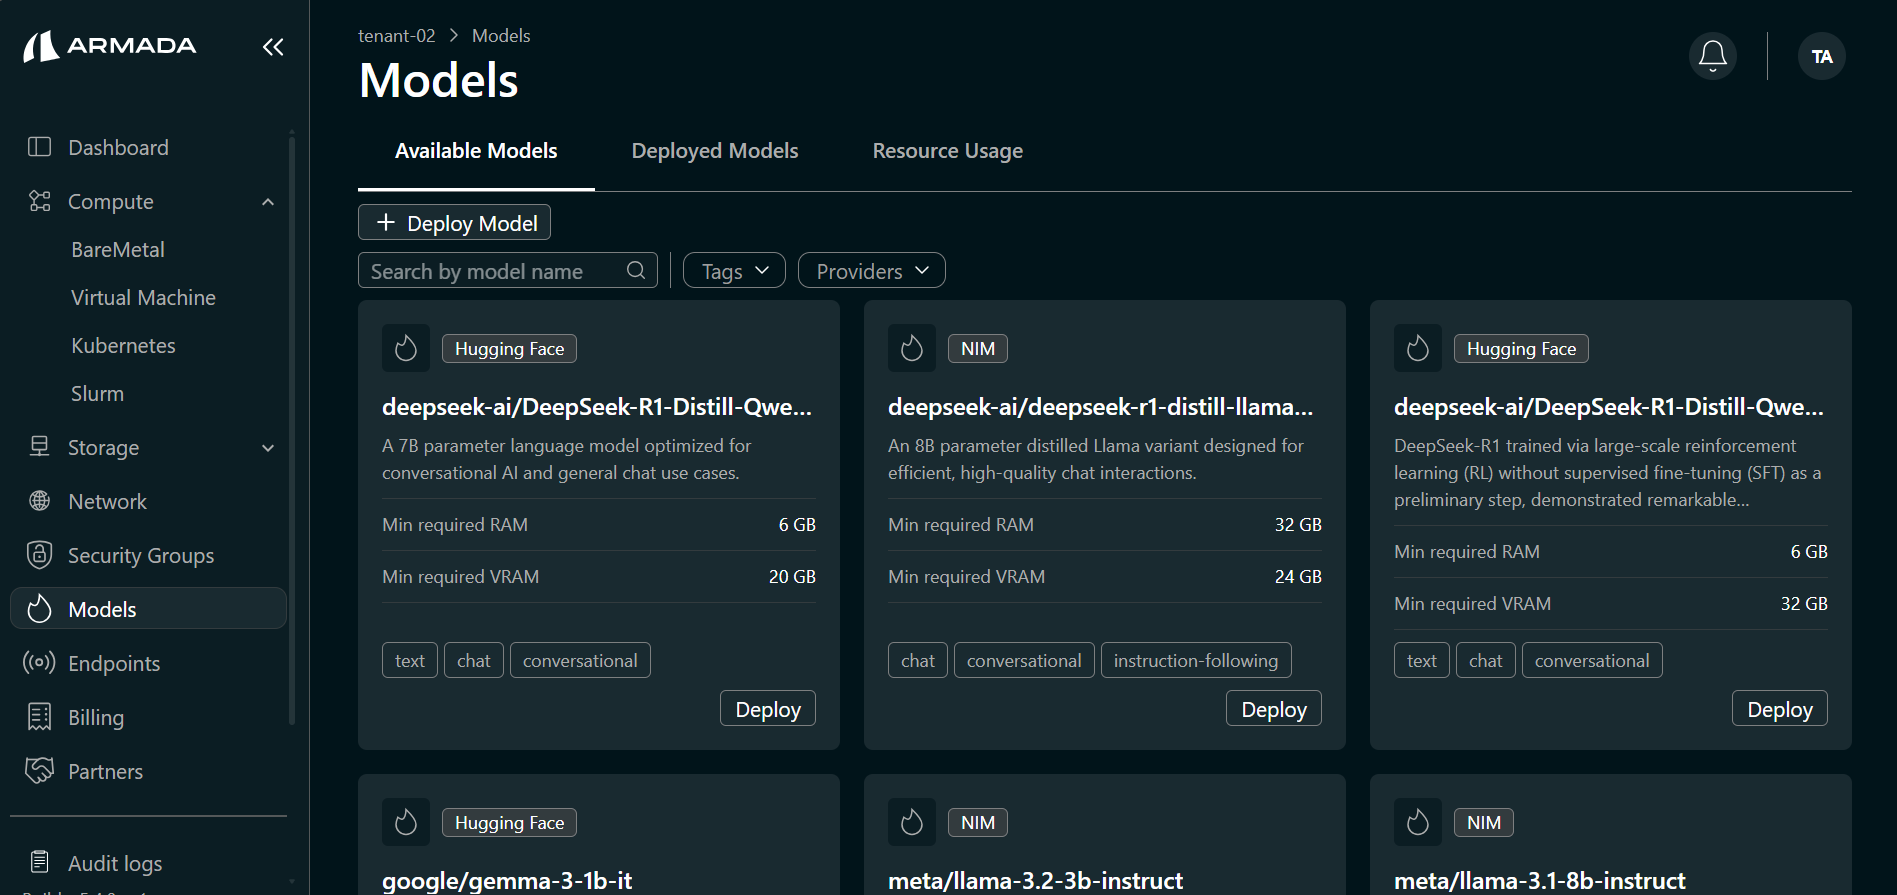
- Select the provider as NIM. This filters the list to show only NIM models.
- Find the model you want to deploy (e.g., meta/llama-3.2-3b-instruct) and click Deploy.
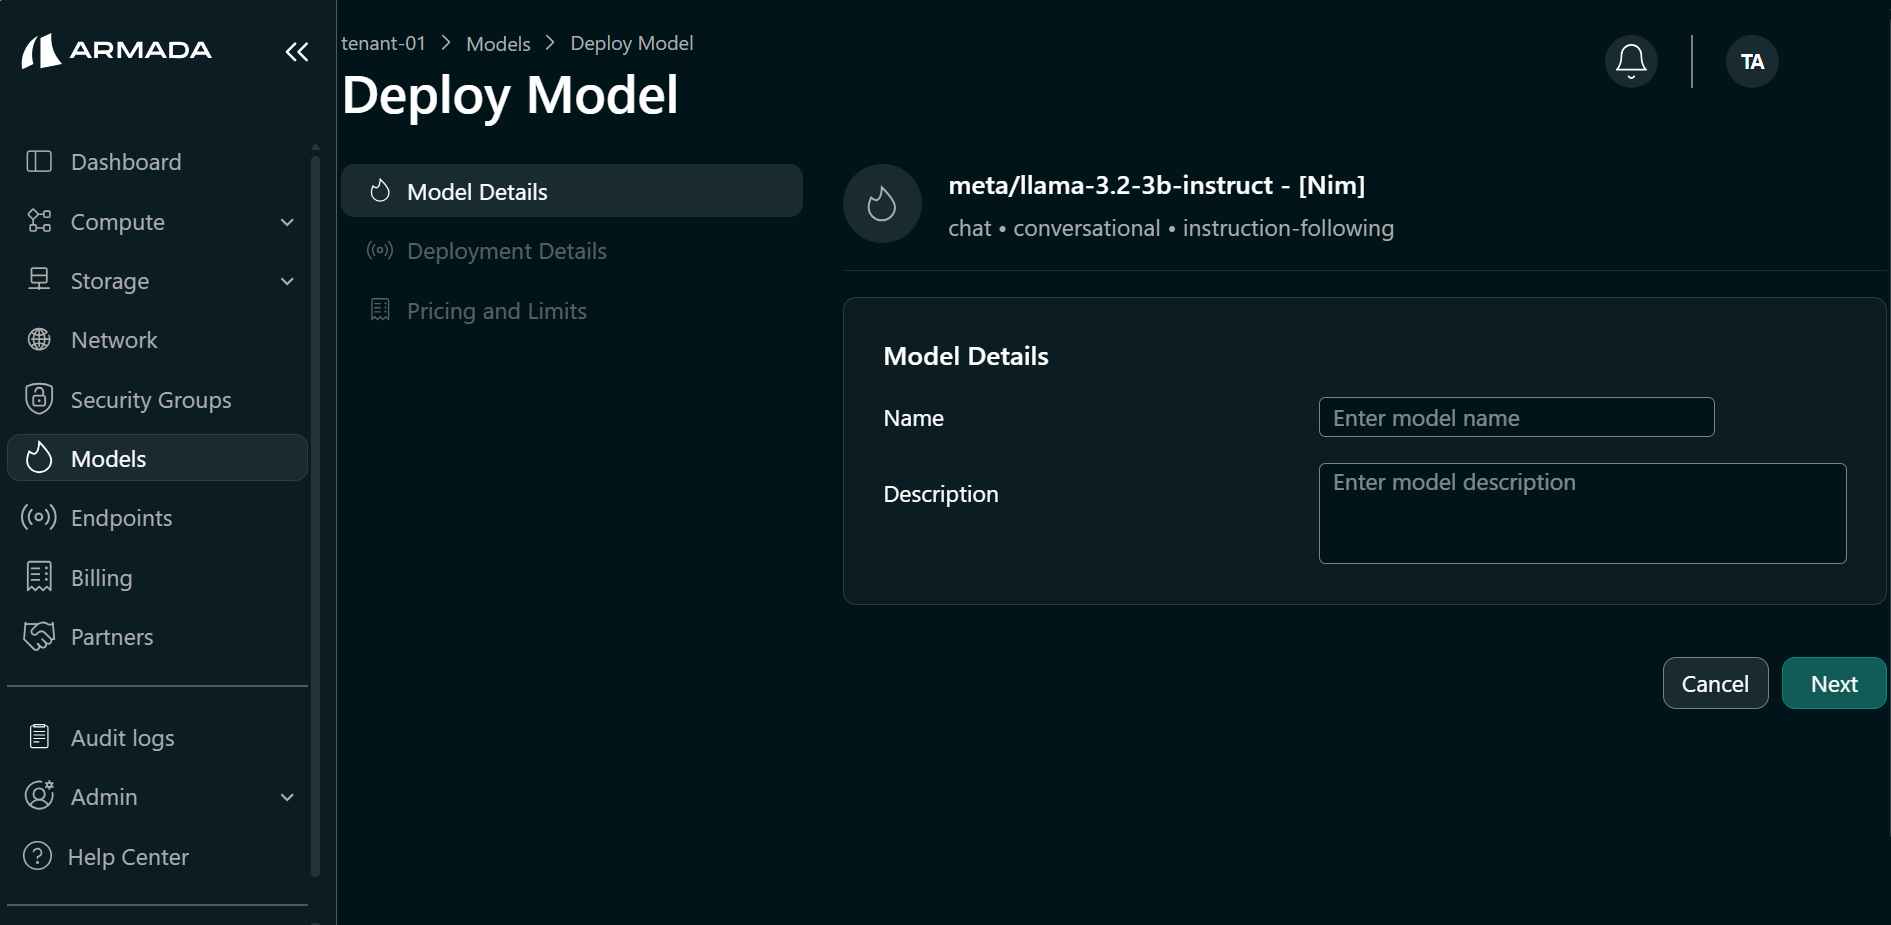
Step 2: Model Details
- Enter a model Name and Description.
- Click Next.
Step 3: Model Configuration
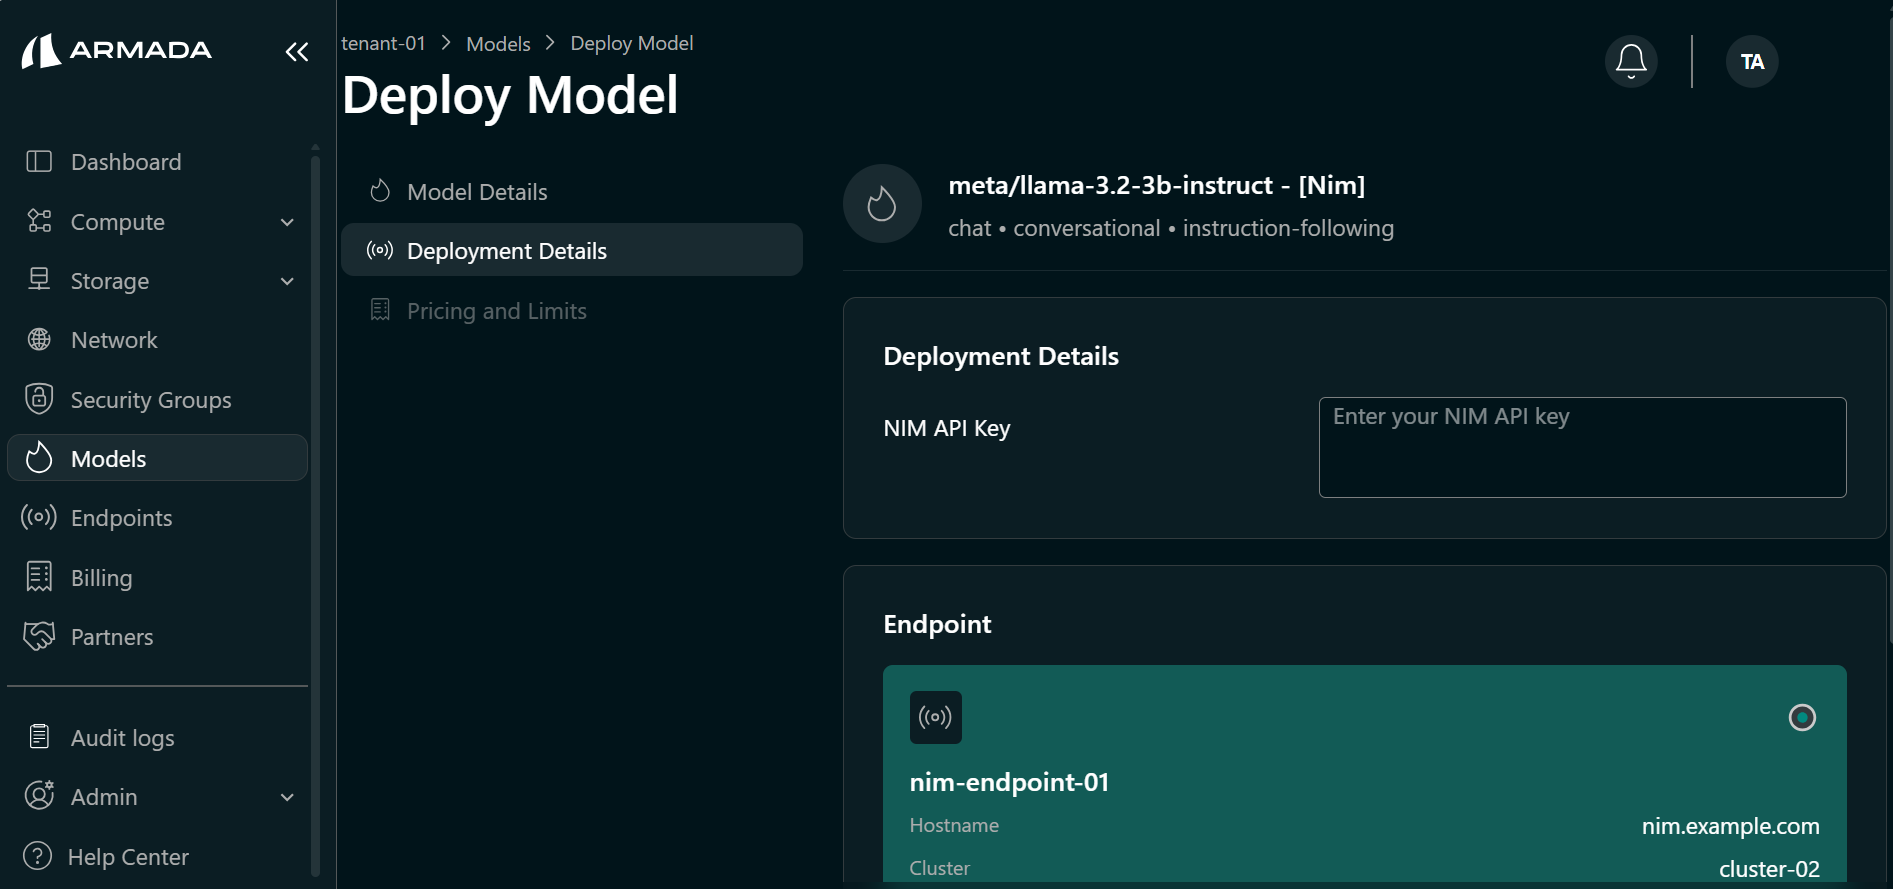
- Enter your NVIDIA NIM API Key to authenticate and pull the NIM container image.
info
- NVIDIA NIM API Key authenticates your access to NVIDIA NGC to pull the NIM container image. The key is stored securely and used only during the deployment process.
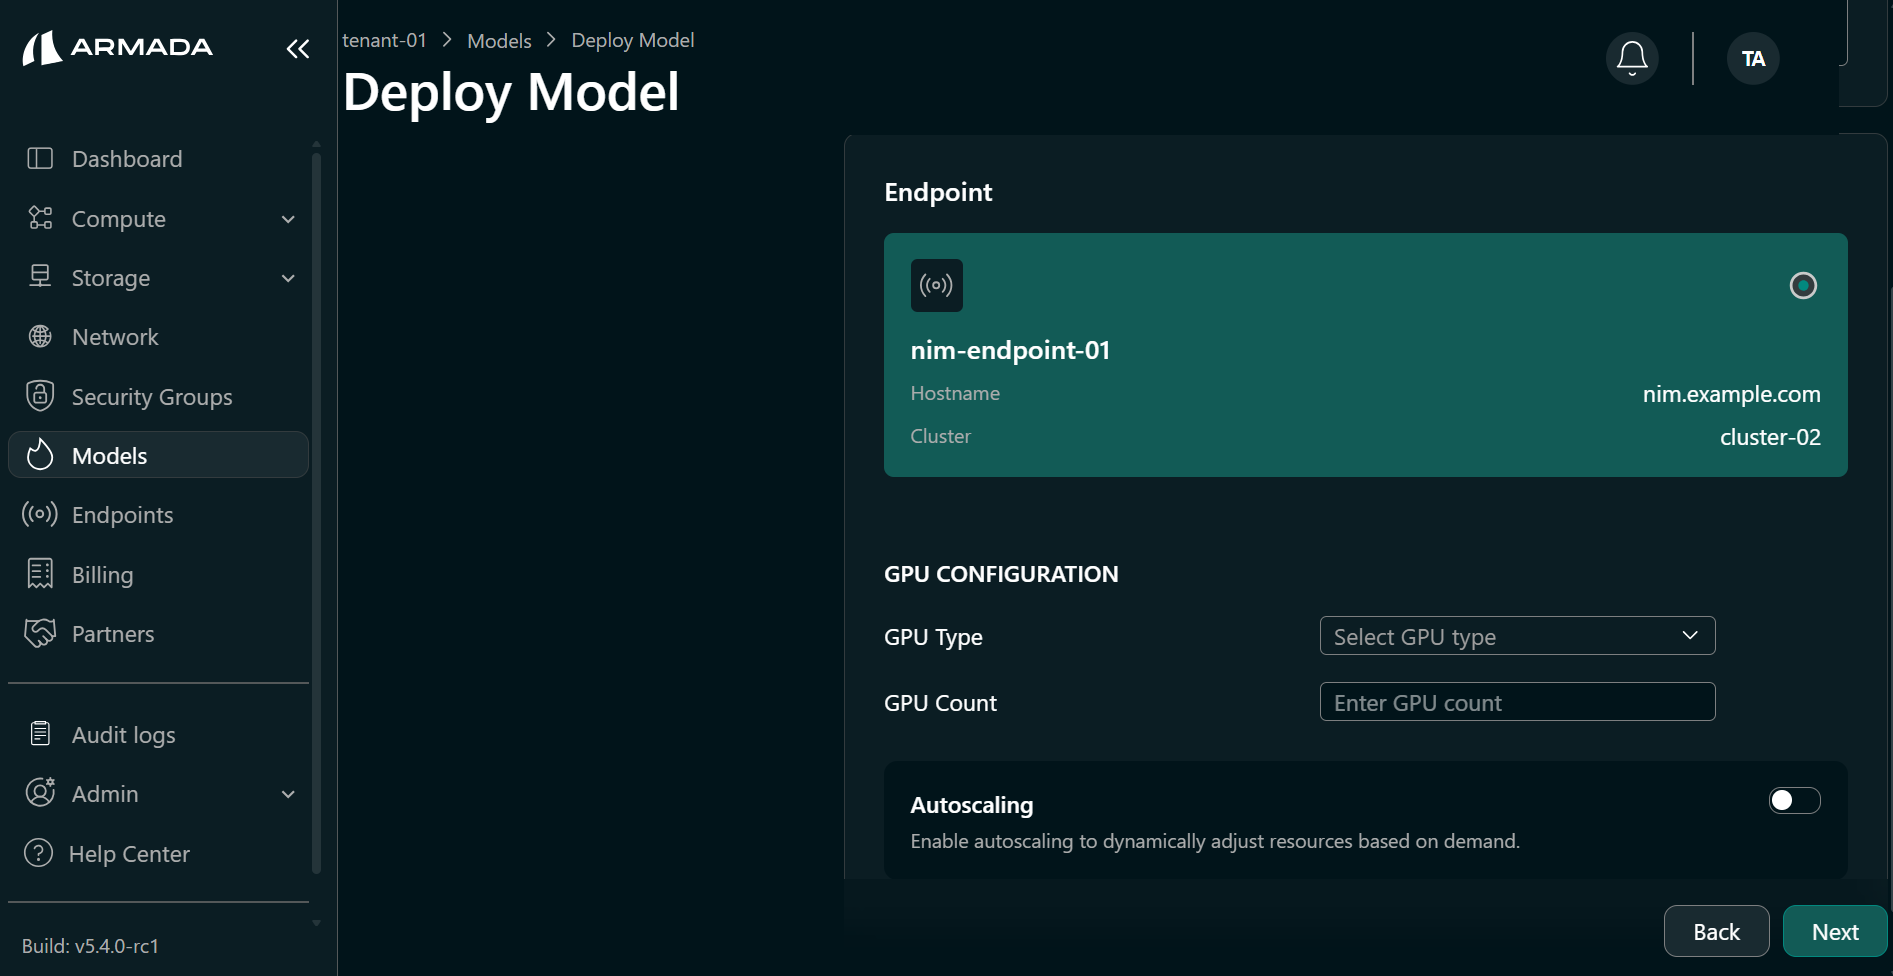
Step 4: Select Endpoint and GPU
- Select the Endpoint that will expose this model.
- Select the GPU type (e.g., A100, H100, L4).
- Set GPU count (e.g.,
1). - Click Next.
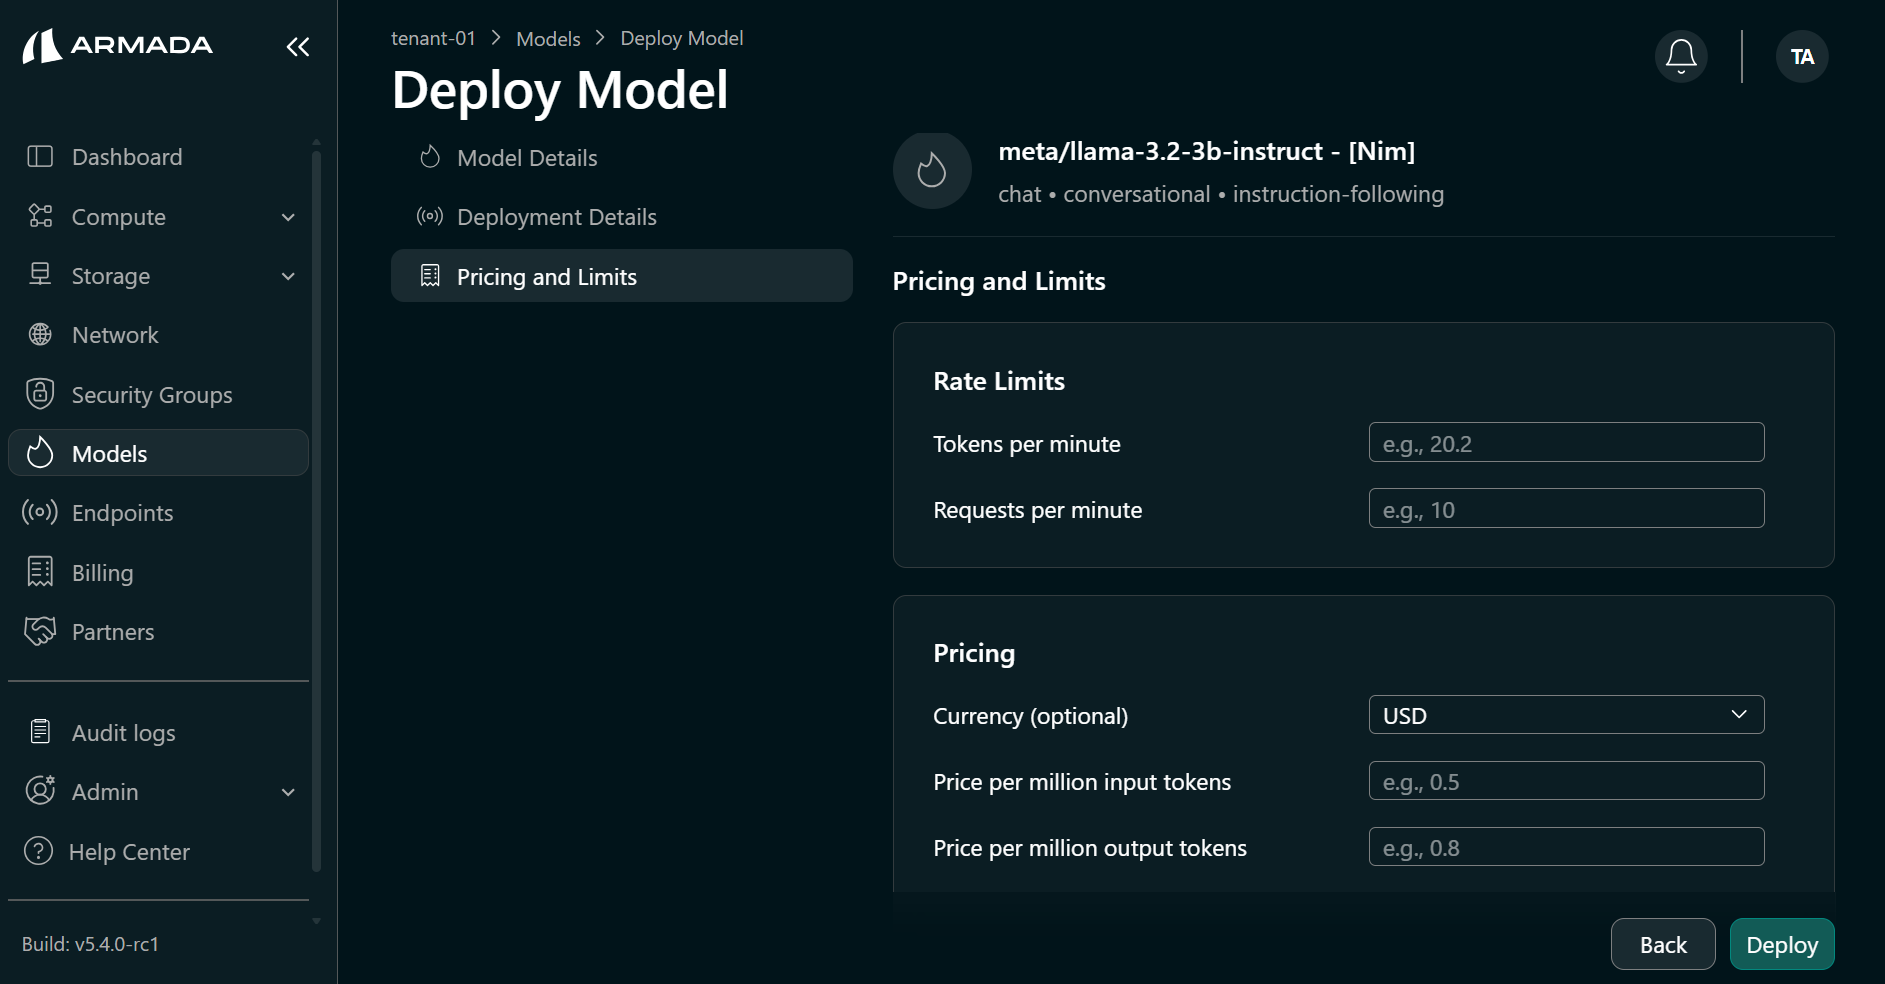
Step 5: Set Rate Limits and Pricing
- Configure the following rate limits and pricing:
- Token per minute — e.g.,
4000000 - Request per minute — e.g.,
50 - Currency — e.g.,
USD - Price per million input tokens — e.g.,
1 - Price per million output tokens — e.g.,
1
- Token per minute — e.g.,
- Click Deploy.
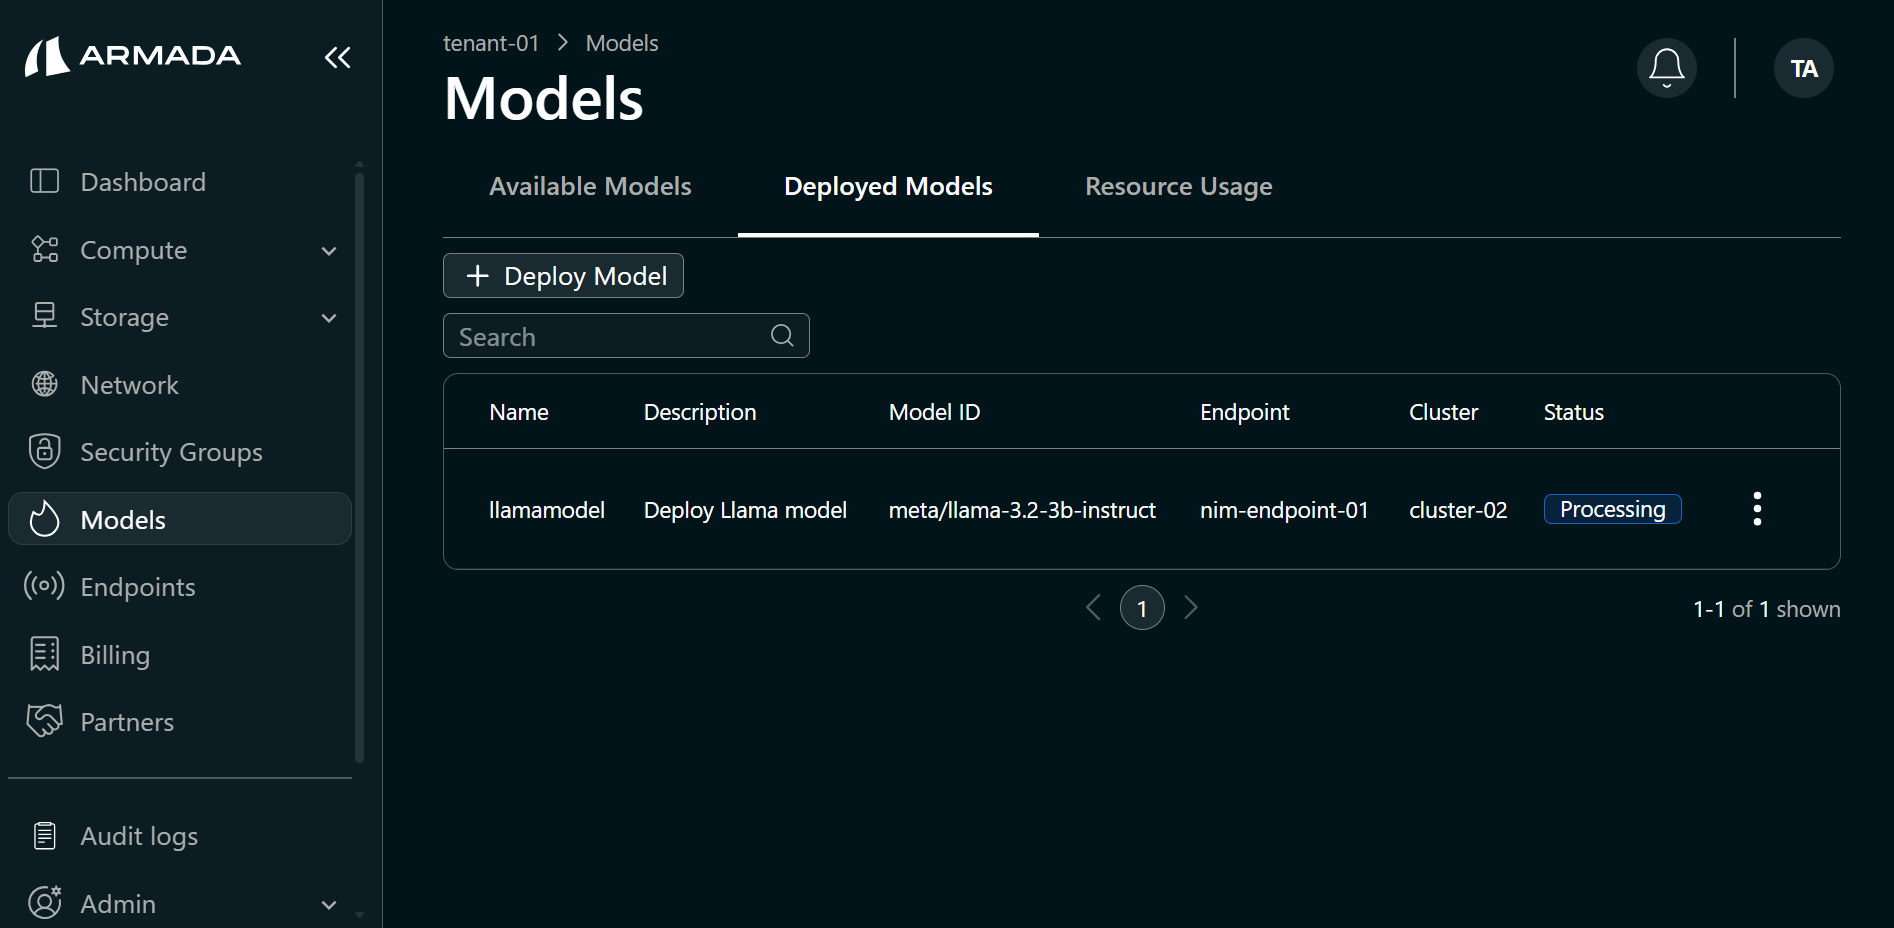
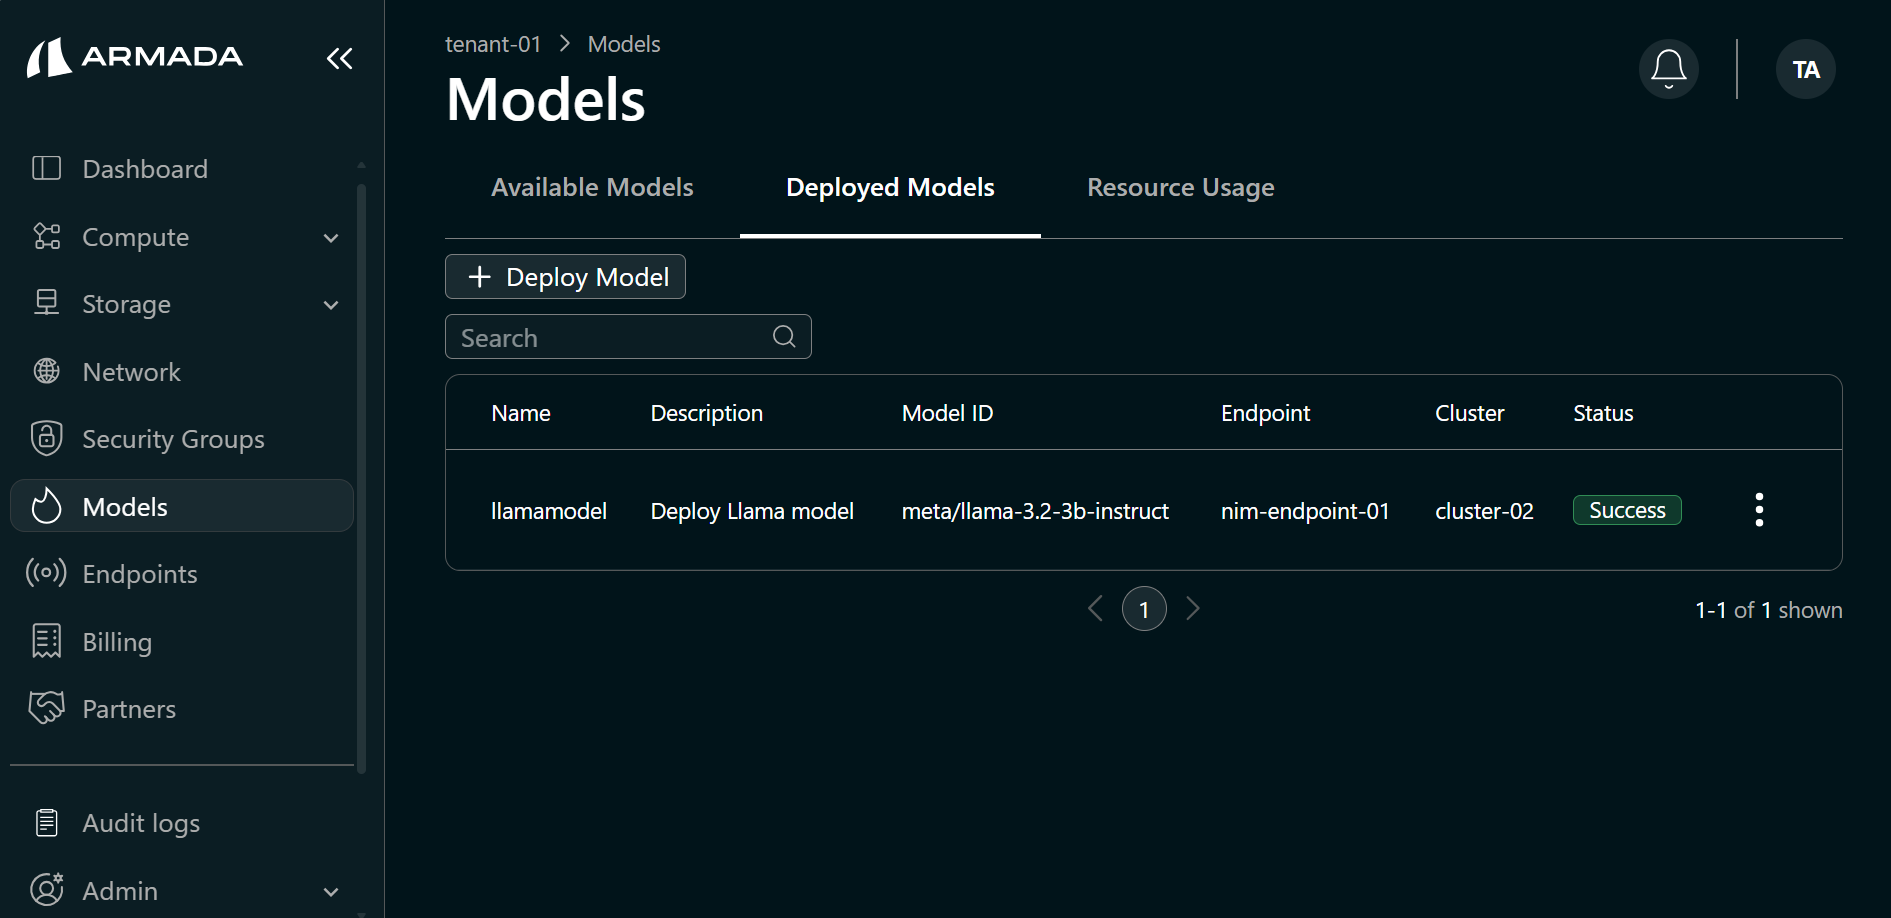
Step 6: Monitor Deployment
Deployment typically takes 5–10 minutes (NIM containers are pre-optimized so startup is faster than pulling raw model weights).
- Watch the deployment progress in the UI. The model status will initially show Processing.
- When deployment completes successfully, the model status shows Running.
Next Steps
- Deploy Hugging Face Model — Deploy open-source Hugging Face models.
- Deploy Azure ML Model — Deploy models from your Azure ML model registry.
- Access Model Playground — Test deployed AI models interactively by sending prompts and inspecting responses in real time.