BareMetal Allocation
Overview
BareMetal allocation allows you to allocate physical servers directly from your infrastructure quota to your tenant for maximum performance and flexibility.
Prerequisites
- Tenant Admin access — Log in as a Tenant Admin to allocate bare metal resources.
- Compute resources — Available physical servers in the infrastructure assigned to your tenant.
- VPC and subnets — If infrastructure was discovered via topology discovery, create at least one compute VPC and subnet before allocating bare metal. Create a converged VPC and subnet only when the topology includes storage nodes (converged topology). See Getting Started with Networking.
Allocate Bare Metal Servers
Step 1: Navigate to BareMetal
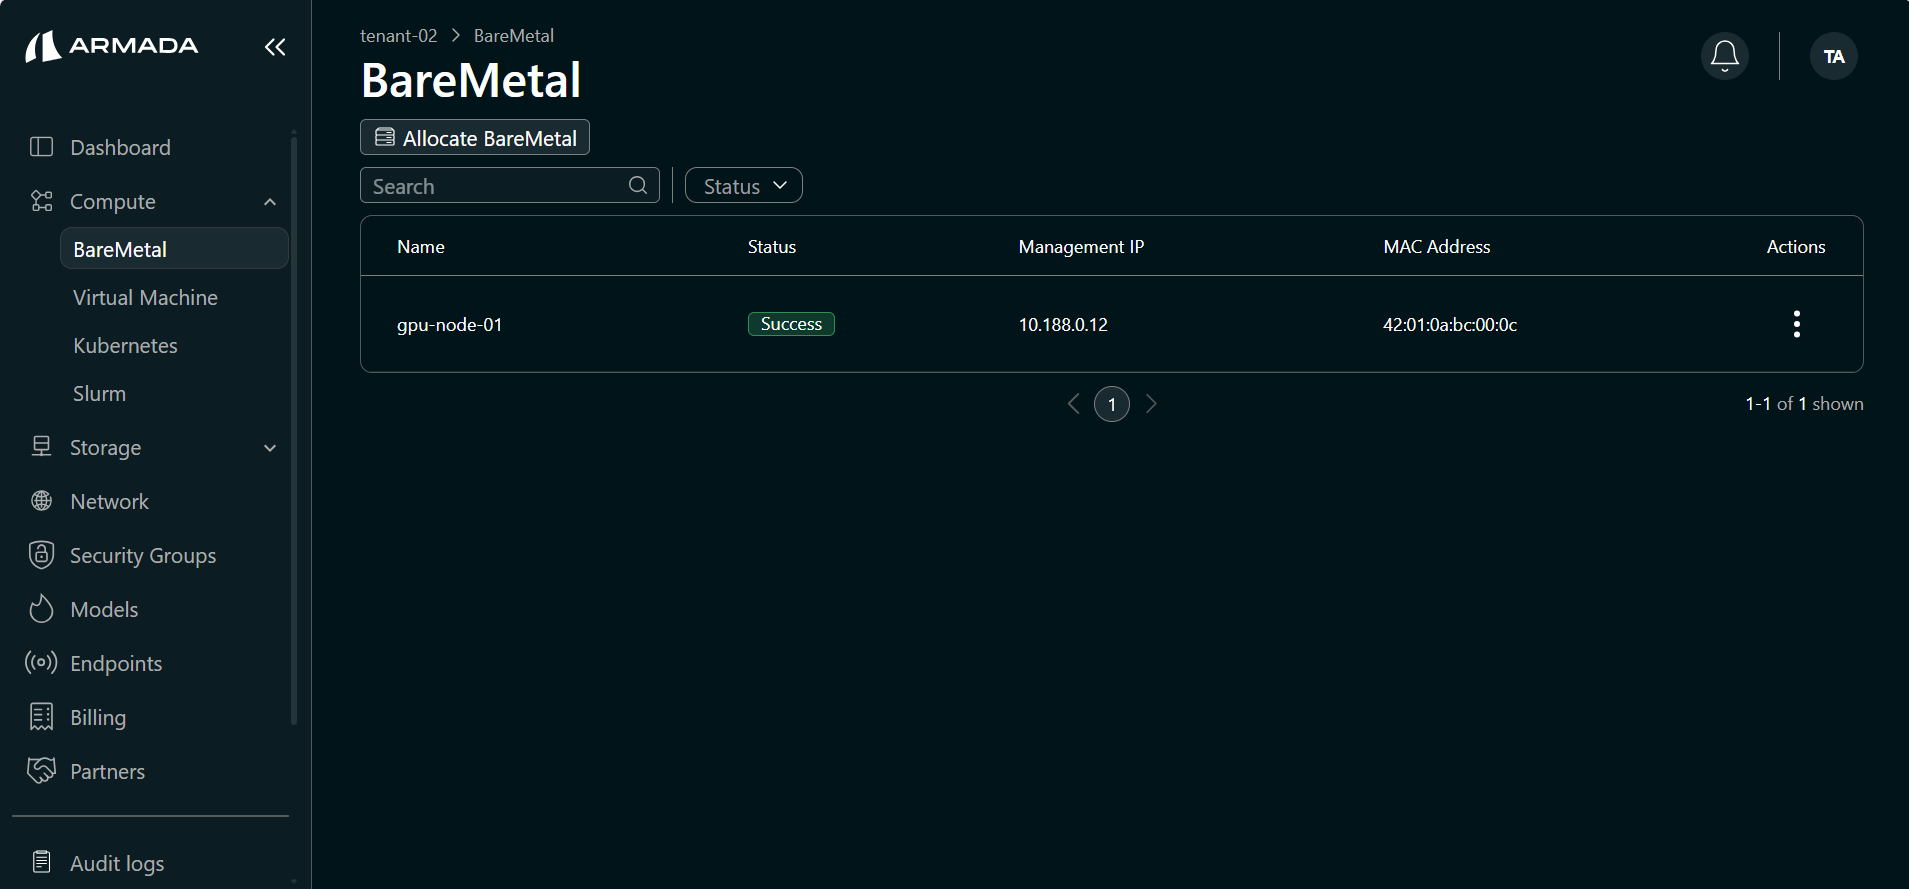
- In the left sidebar, go to Compute → BareMetal.
- Click Allocate BareMetal to allocate new Bare Metal resources.

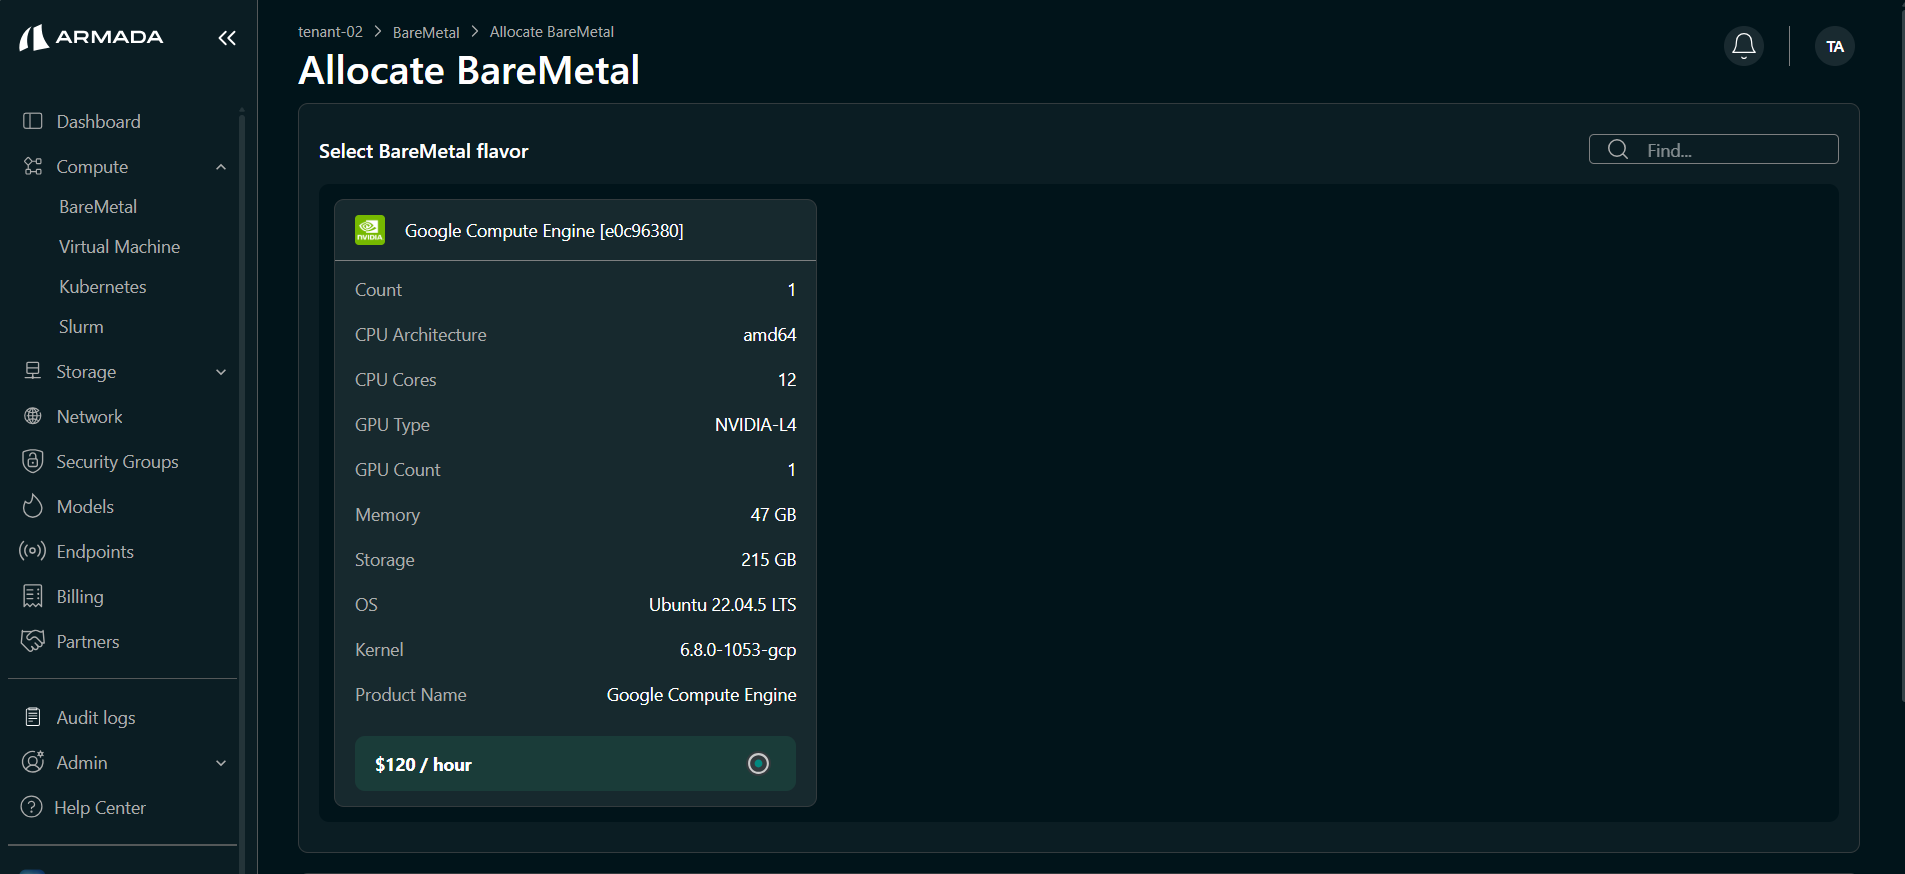
Step 2: Select BareMetal Flavor
- Review the available BareMetal flavors. Each flavor displays:
- CPU Architecture and Cores
- GPU Type and Count
- Memory and Storage
- OS and Kernel version
- Product Name
- Pricing (per hour)
- Select the flavor that matches your workload requirements.
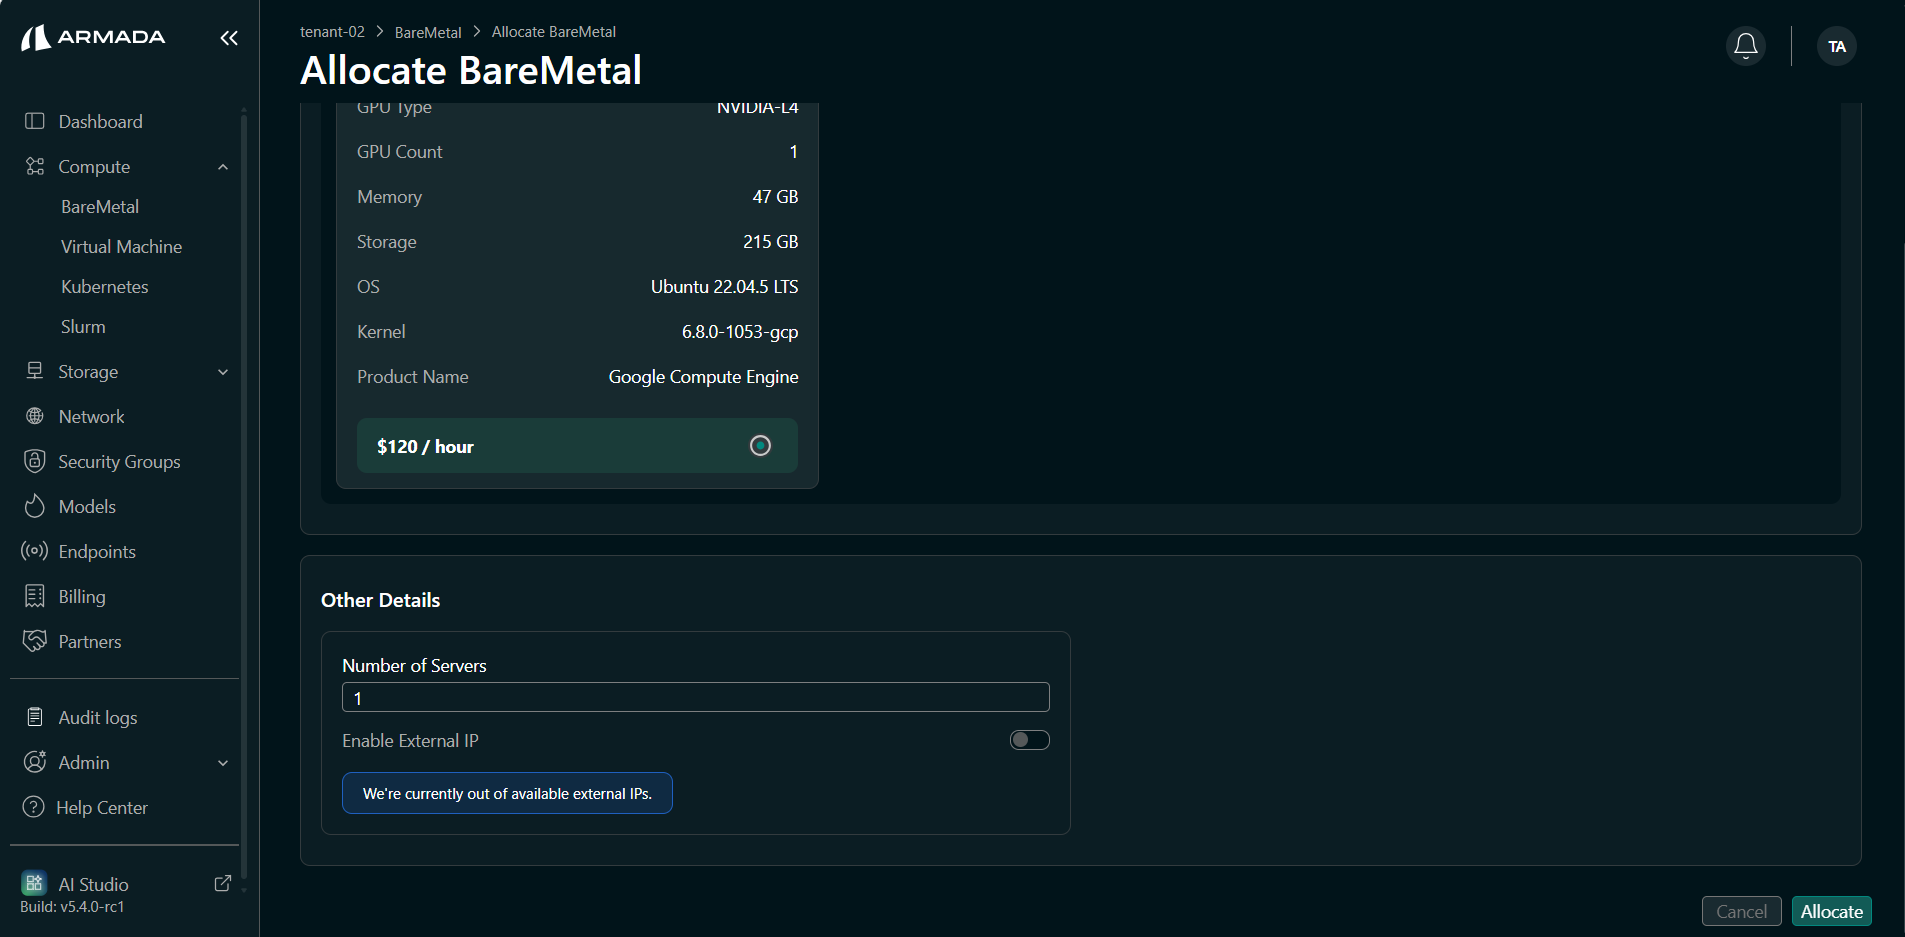
Step 3: Configure Other Details
- Enter the Number of Servers to allocate.
- (Optional) Enable External IP if your workload requires external access.
- Review the configuration summary.
note
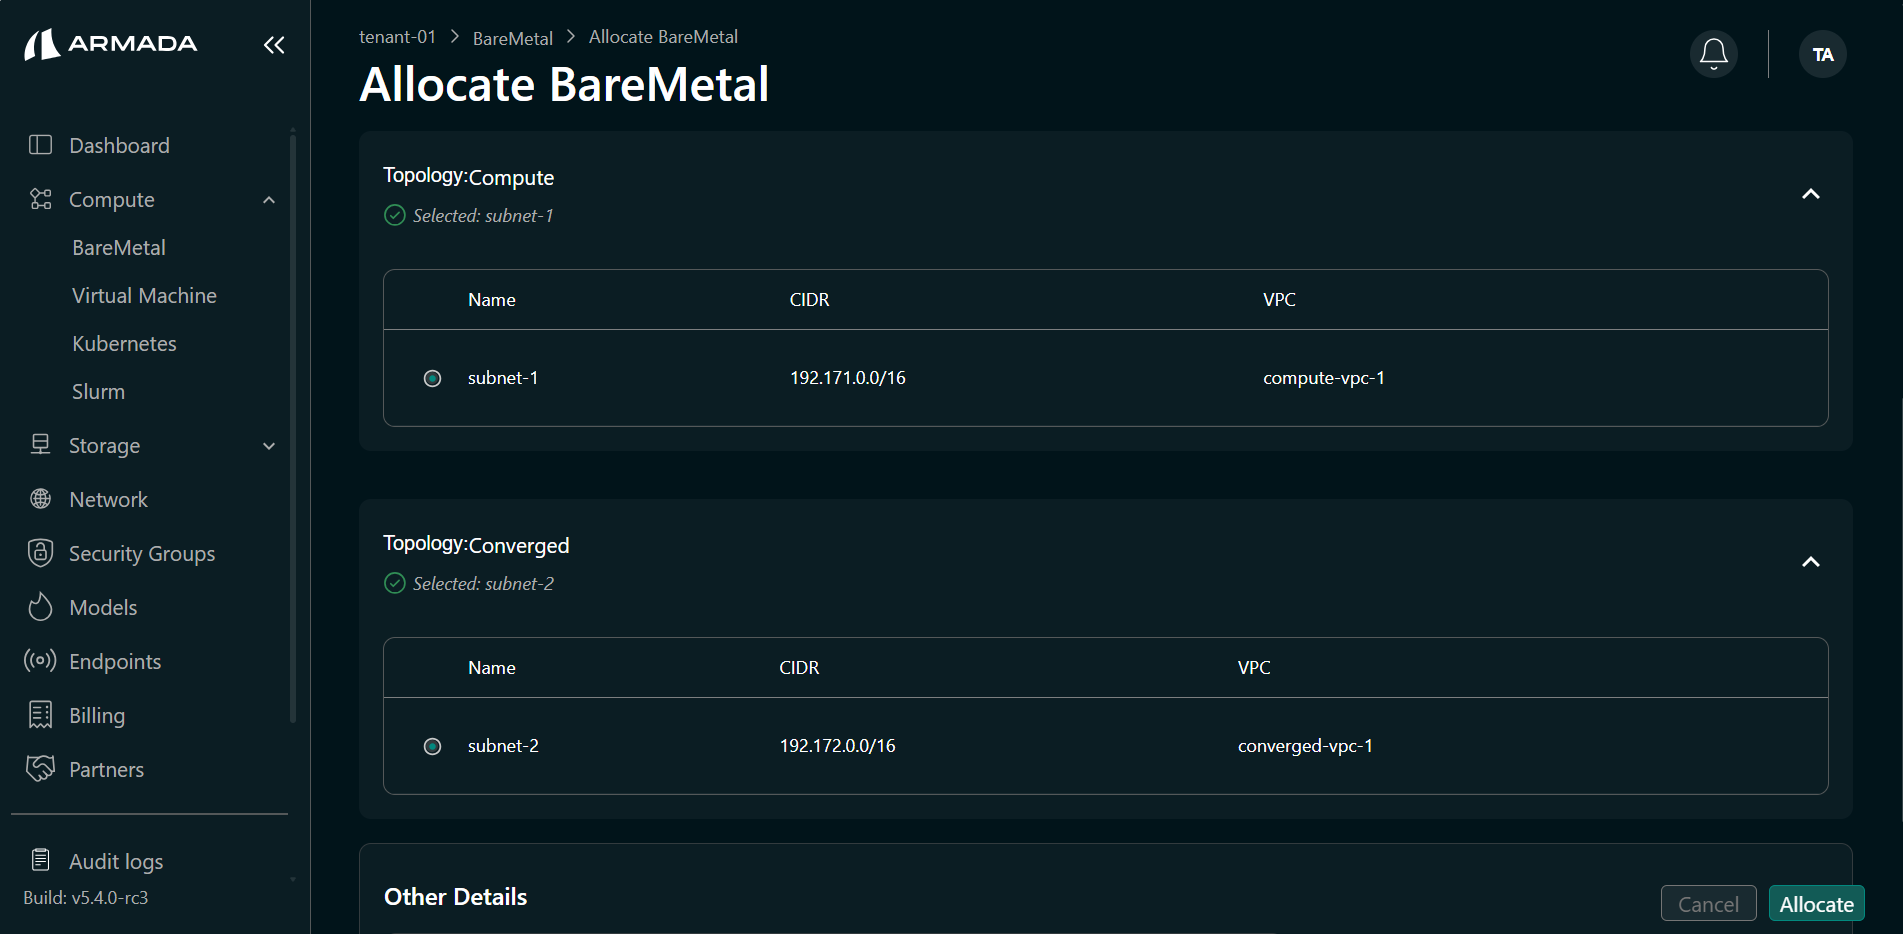
If the infrastructure was discovered via Discover Infra flow, the allocation flow also asks for subnets. As Tenant Admin, select the compute subnet and the converged subnet.
Step 4: Confirm Allocation
- Click Allocate.
Step 5: Verify Allocation
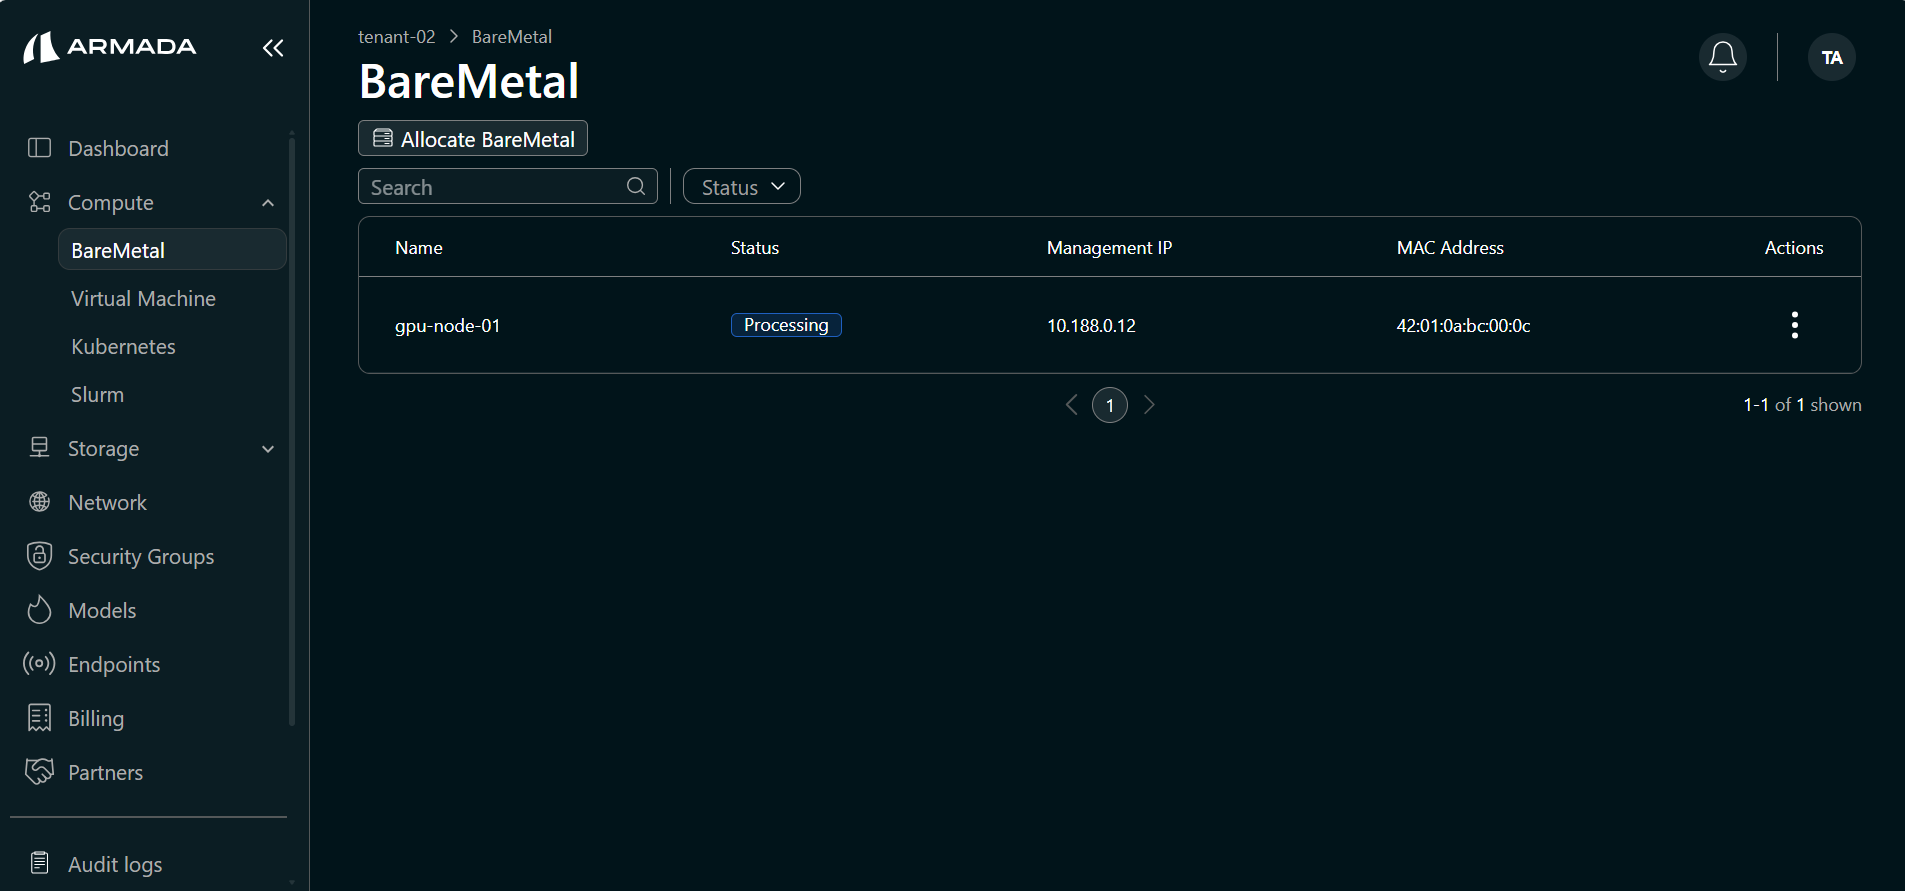
- Wait for allocation to complete.
- Confirm the servers appear in your allocated resources list.
Manage Allocated Bare Metal
Step 1: Open Resource Details
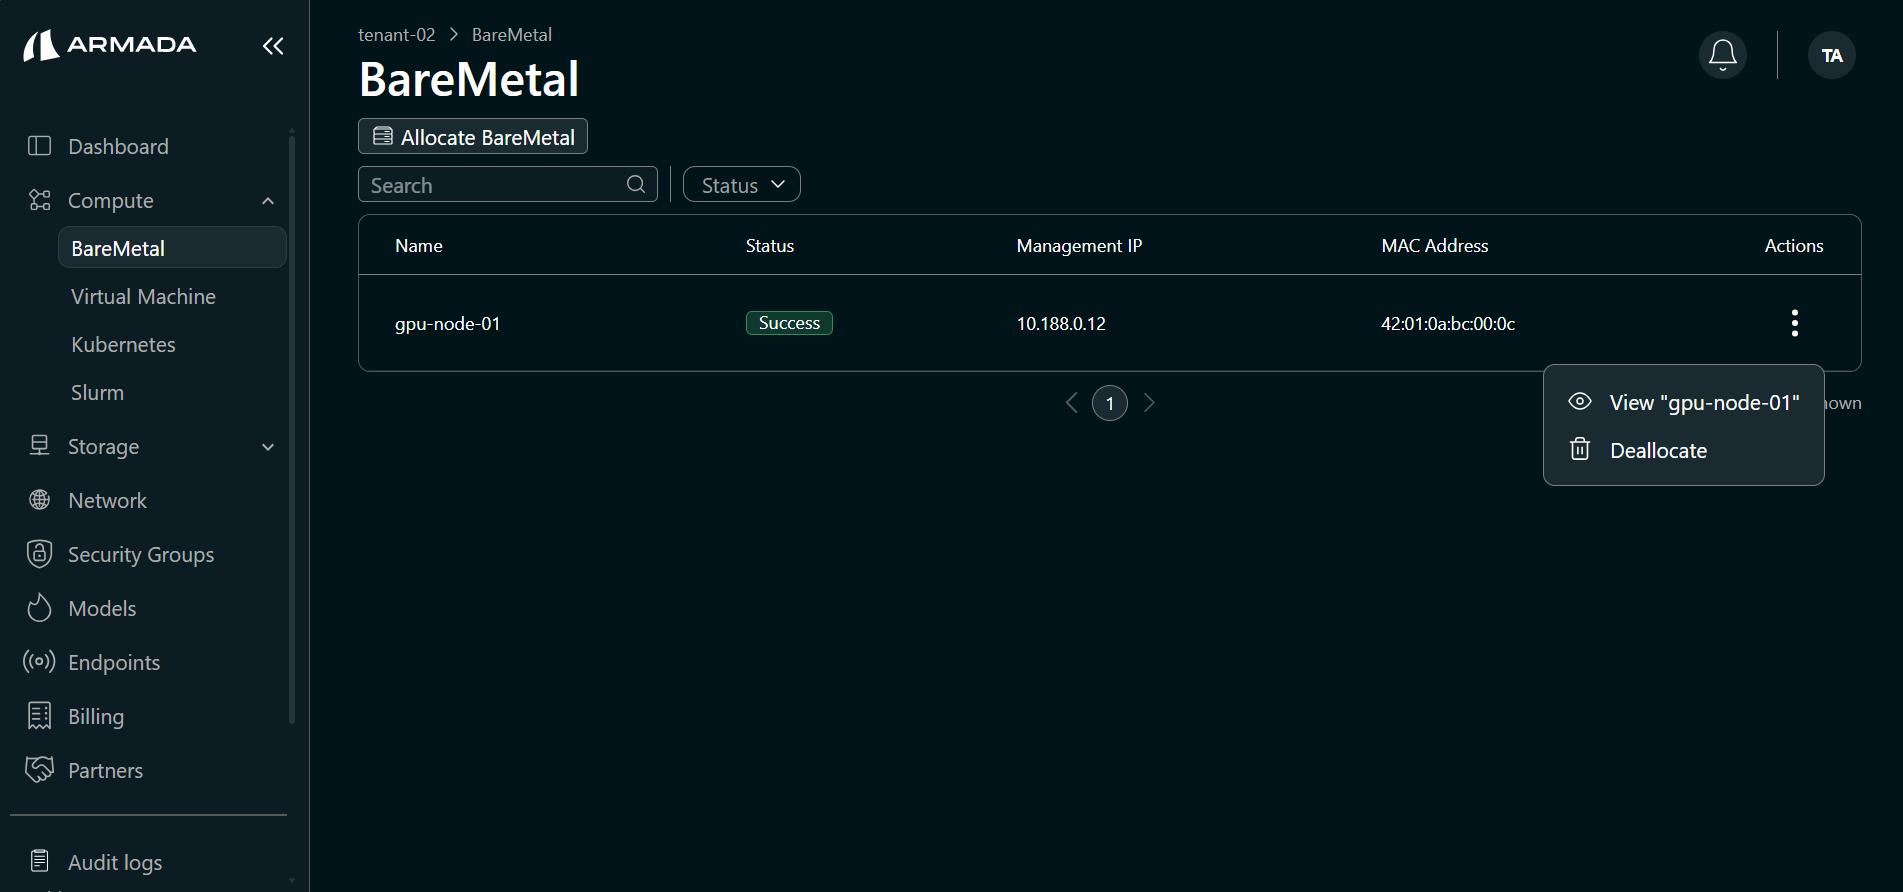
- Click the Bare Metal name from the list, or click the menu (ellipsis) icon and select View.
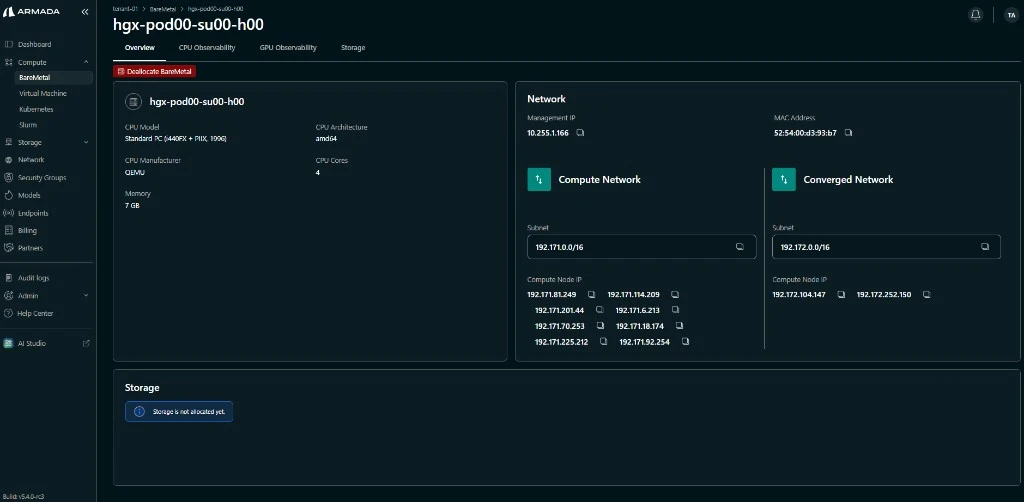
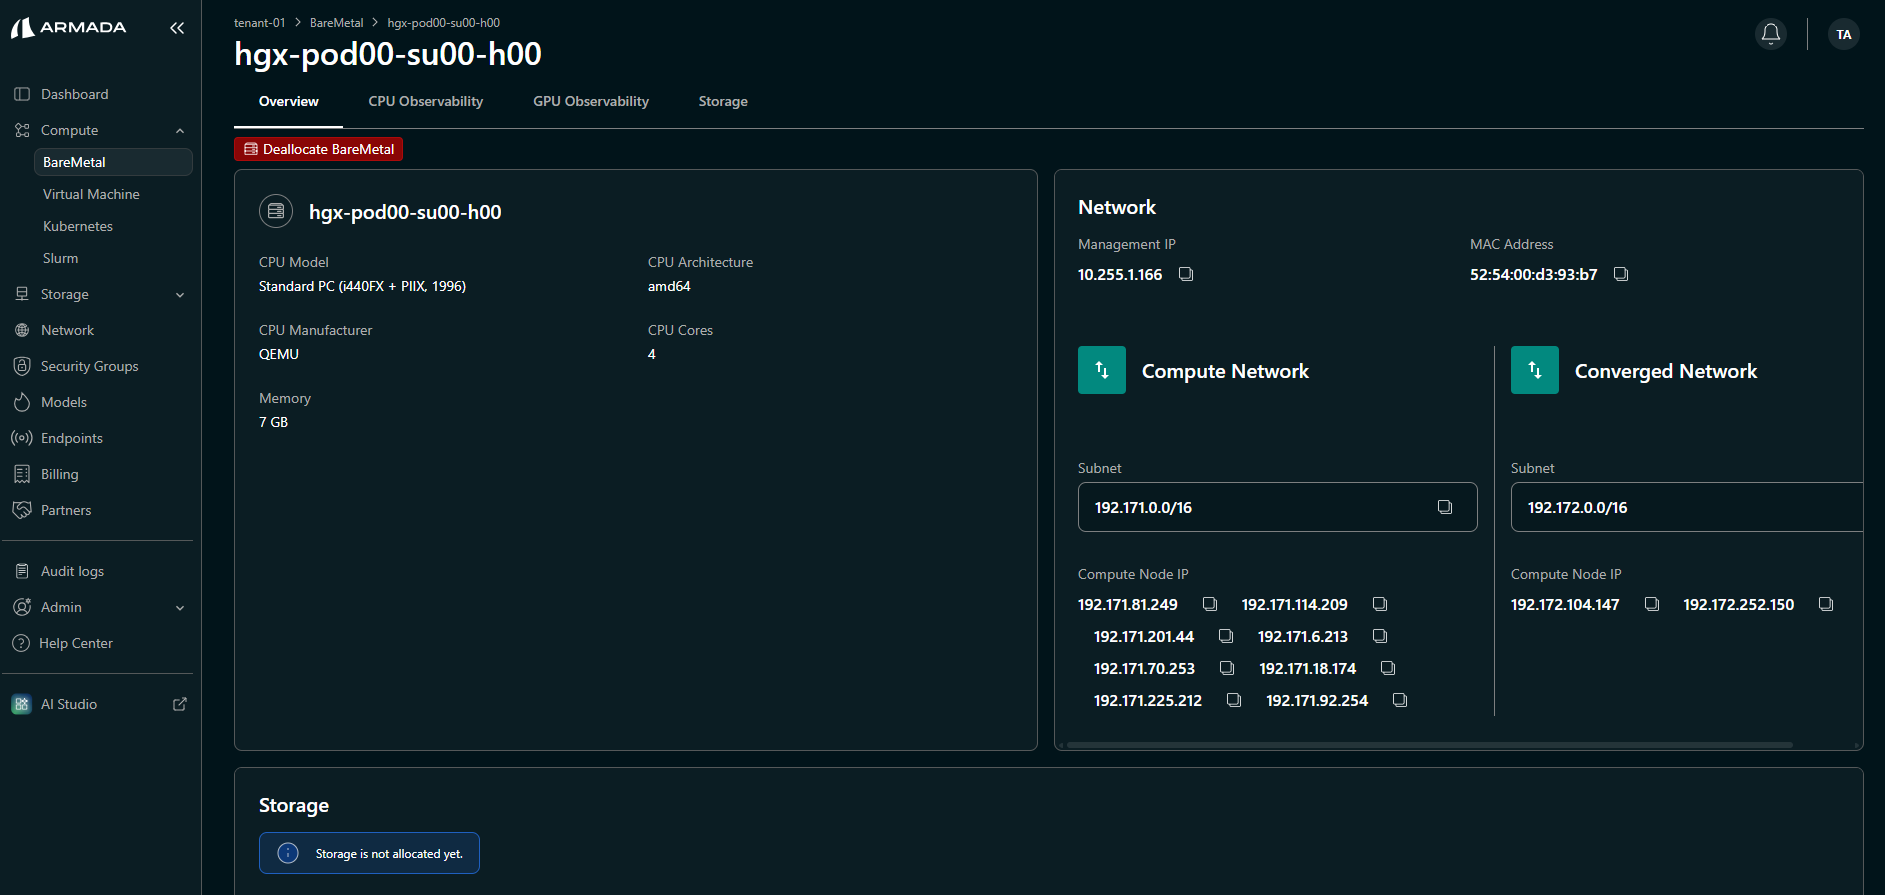
Step 2: Review Overview
- Open the Overview tab.
- Review hardware details:
- CPU Model and Manufacturer
- CPU Architecture and Cores
- Memory
- Review Network details including Management IP, MAC Address, and assigned subnet interface IPs.
- Review Storage status.
info
If no storage is attached, this section displays "Storage is not allocated yet".
note
When you select subnets during bare metal allocation (discovery-based infrastructure), the Overview tab Network card shows additional interface details:
- Compute Network — the compute subnet CIDR and assigned compute node interface IPs.
- Converged Network — the converged subnet CIDR and assigned converged interface IPs. This section appears only when your topology includes storage nodes (converged topology).
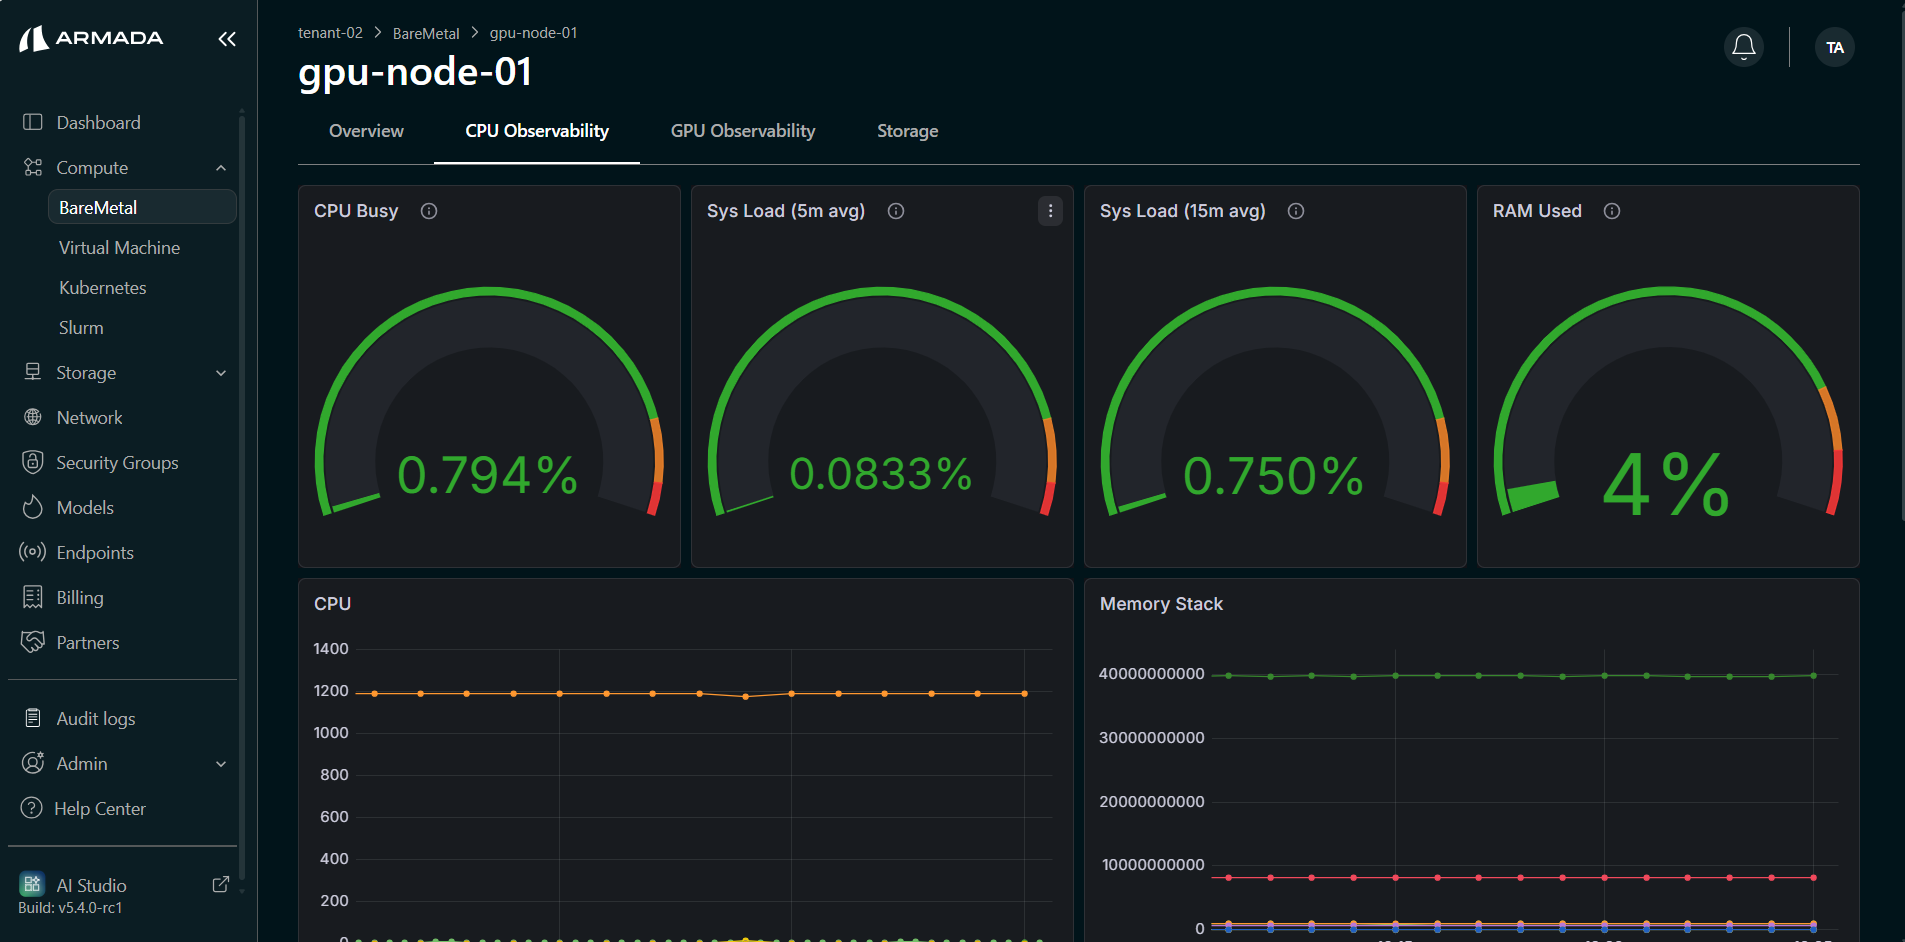
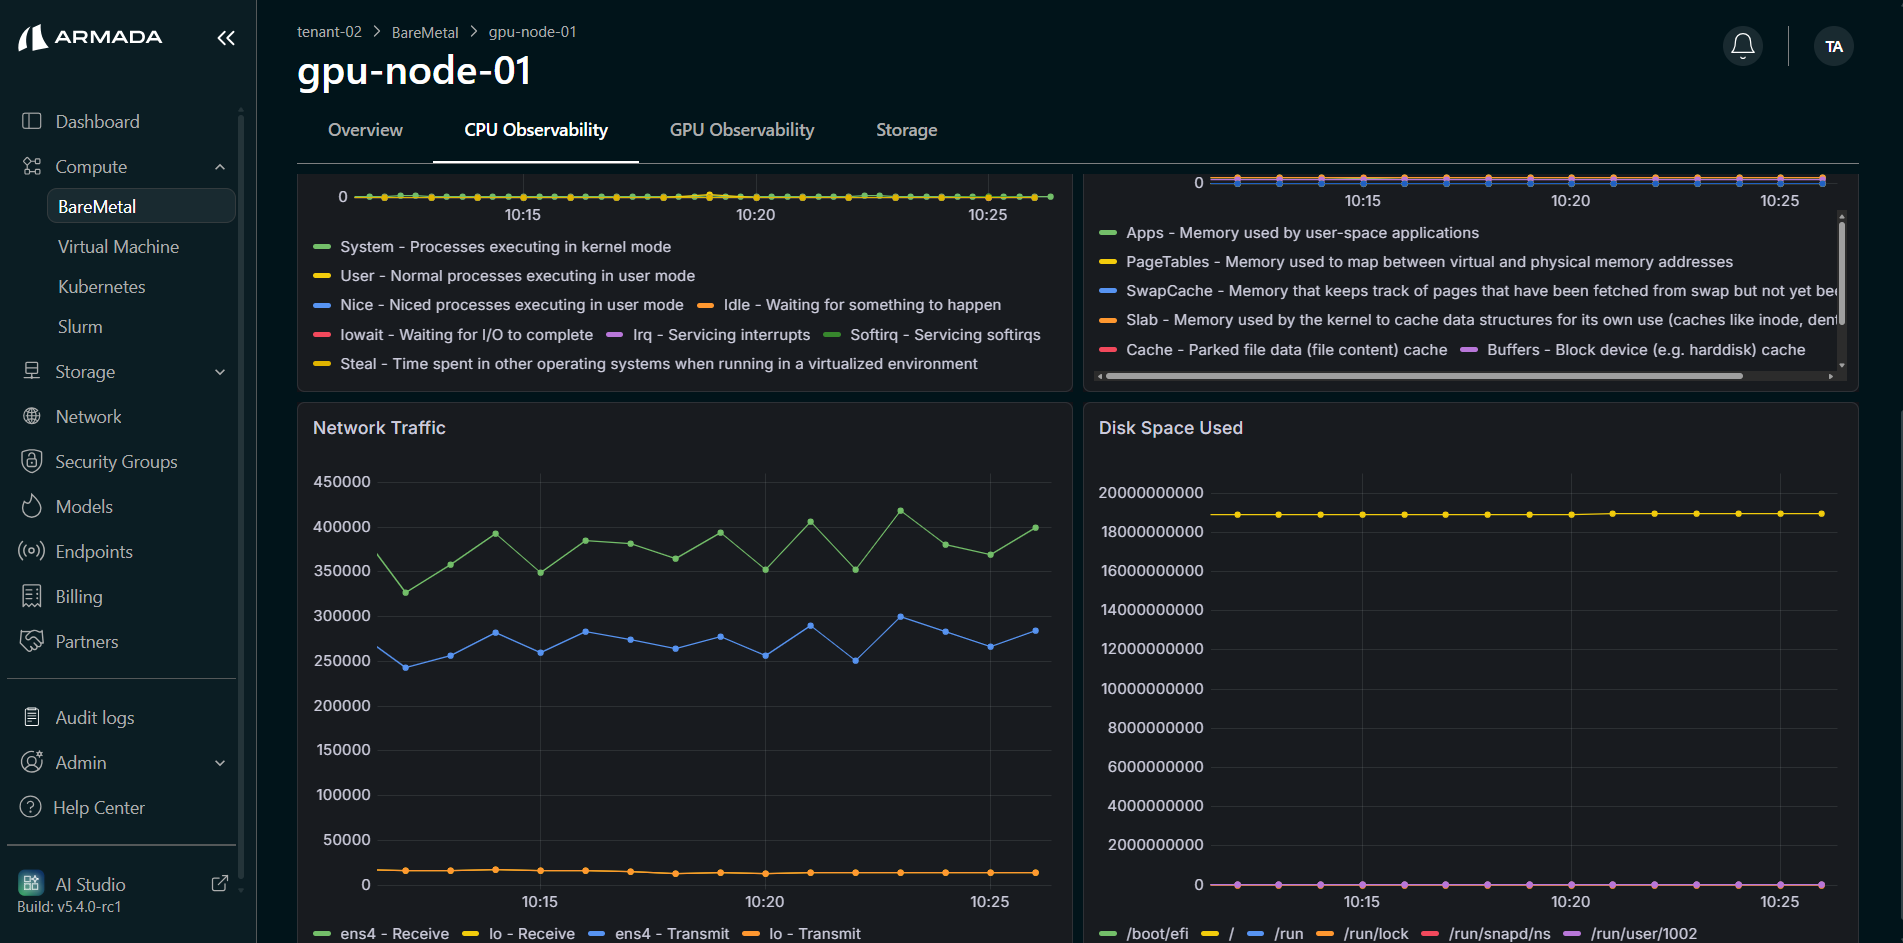
Step 3: Review CPU Observability
- Open the CPU Observability tab.
- Review real-time metrics such as CPU Busy, System Load, RAM Usage, CPU Utilization, Memory, Network Traffic, and Disk usage.
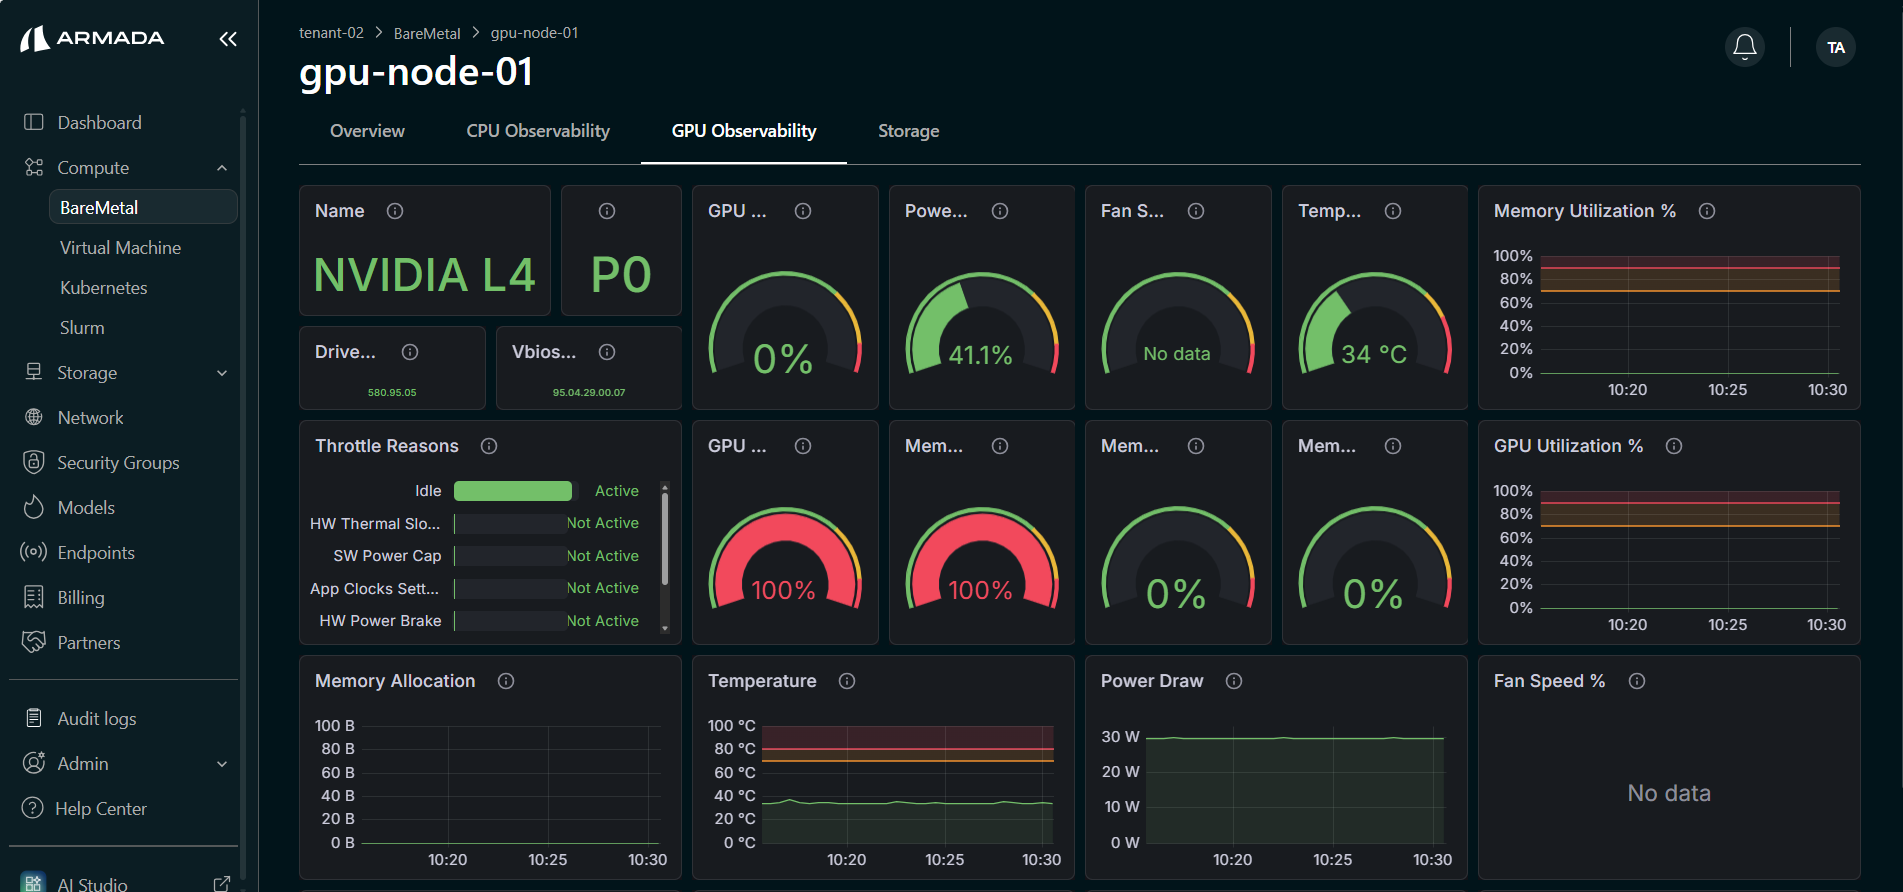
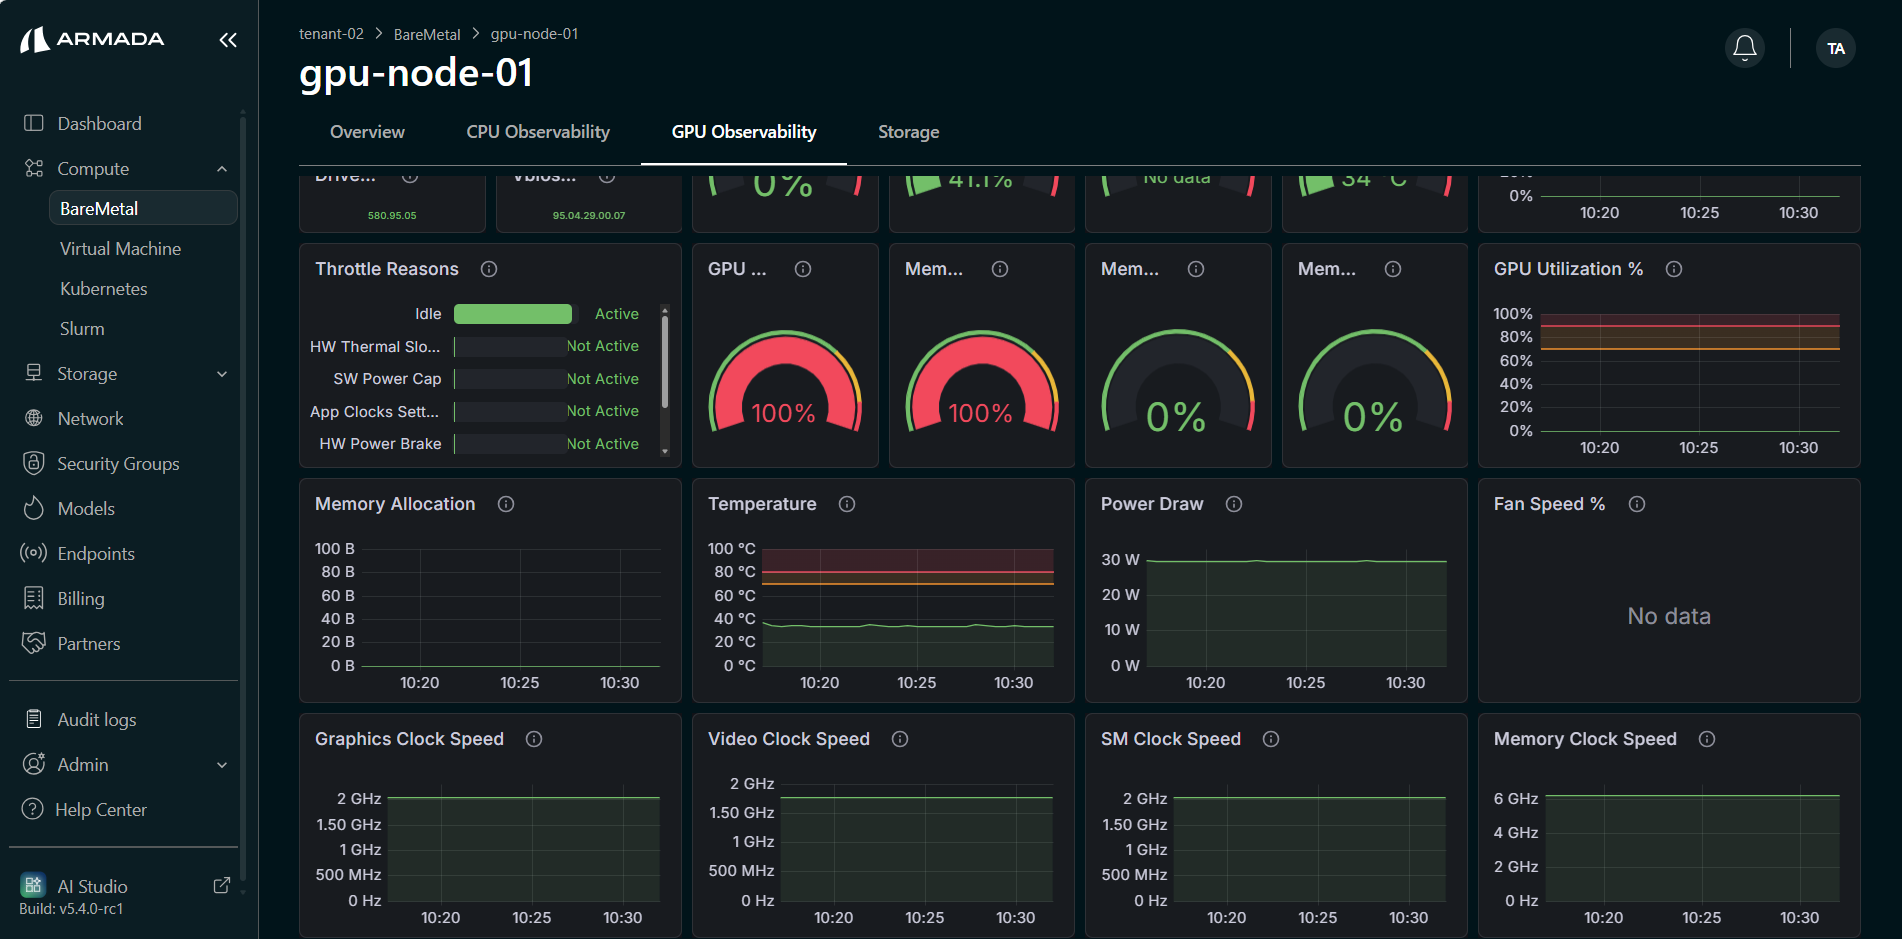
Step 4: Review GPU Observability
- Open the GPU Observability tab.
- Review real-time GPU metrics such as utilization, power draw, clock speeds, memory usage, temperature, and fan speed.
Next Steps
- Volumes — Create a storage volume and mount it on your allocated baremetal server.
- Create a Kubernetes Cluster — Provision a Kubernetes cluster using allocated bare metal resources.
- Create a Slurm Cluster — Provision a Slurm cluster for HPC workloads.