Tenant Creation
Tenants are isolated environments within Bridge that represent separate organizations or business units. Each tenant has its own users, resource quotas, and pricing configuration. The Super Admin creates and manages tenants.
note
A custom Super Admin user with the Tenant Create permission can also create tenants.
Prerequisites
- Infrastructure import or discovery — Day 0 setup must be complete with servers imported into Bridge.
- Default quotas (optional) — Configure default quotas to set baseline resource limits for new tenants.
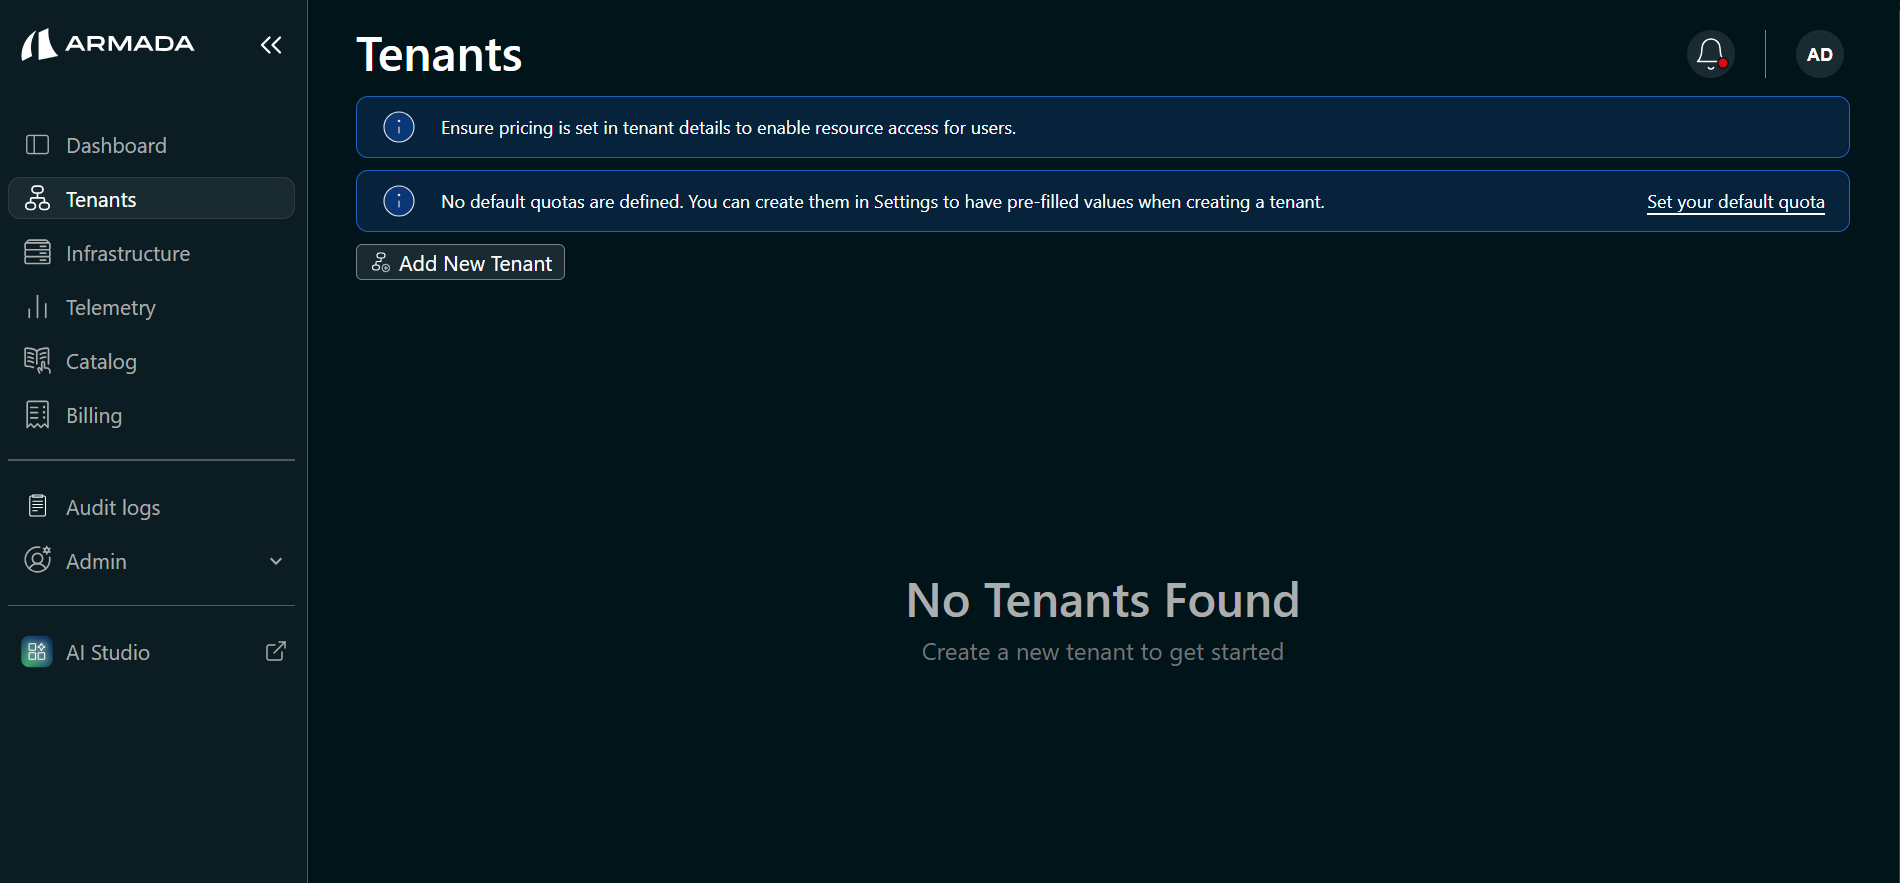
Create a Tenant
- In the sidebar, click Tenants, then click Add New Tenant.
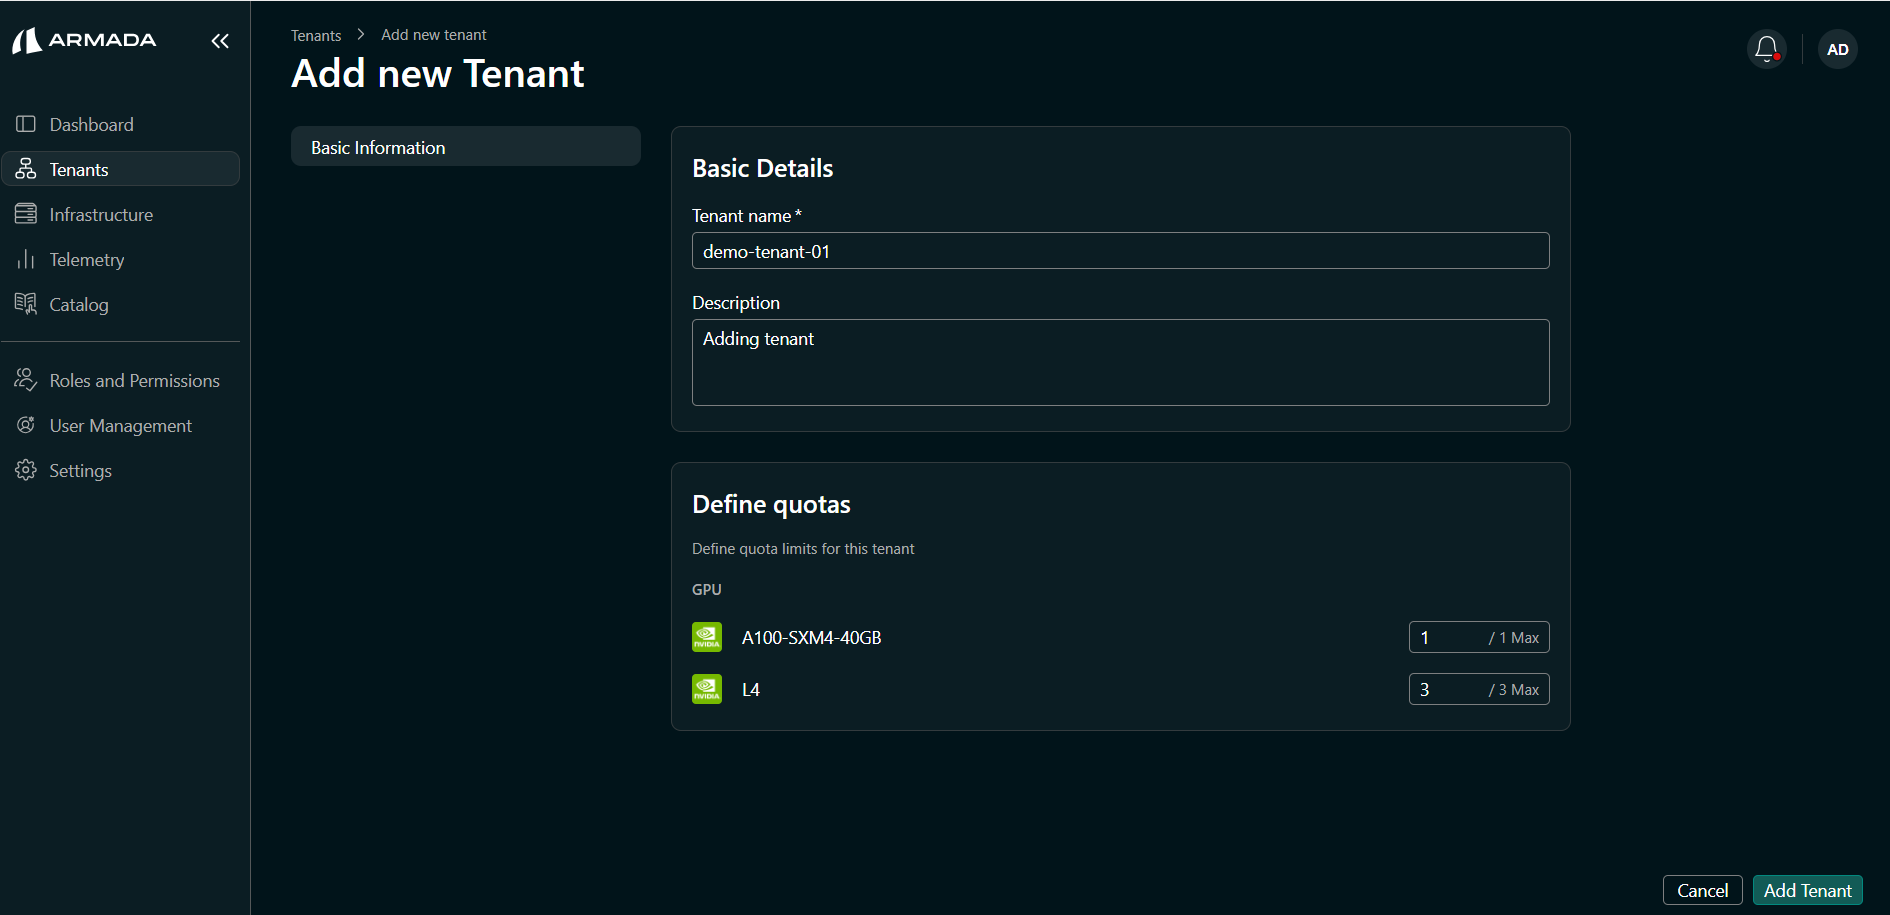
- Enter the required details:
- Tenant Name
- Description
- Quotas — initial resource limits for this tenant

- Click Add Tenant. The tenant status shows Processing while Bridge provisions the tenant environment.
- When the status changes to Success, the tenant is ready.

Create a Tenant with Billing Integration (Monetize360)
When Bridge is deployed with the Monetize360 (M360) billing integration, tenant creation includes additional billing and contact information fields.
note
The Billing sidebar is visible in Bridge UI only when Bridge is deployed with Monetize360. For other billing integrations, contact Armada Support.
- In the sidebar, click Tenants, then click Add New Tenant.
- Enter the required tenant details, then click Next:
- Tenant Name
- Description
- Quotas — set the initial resource limits for this tenant
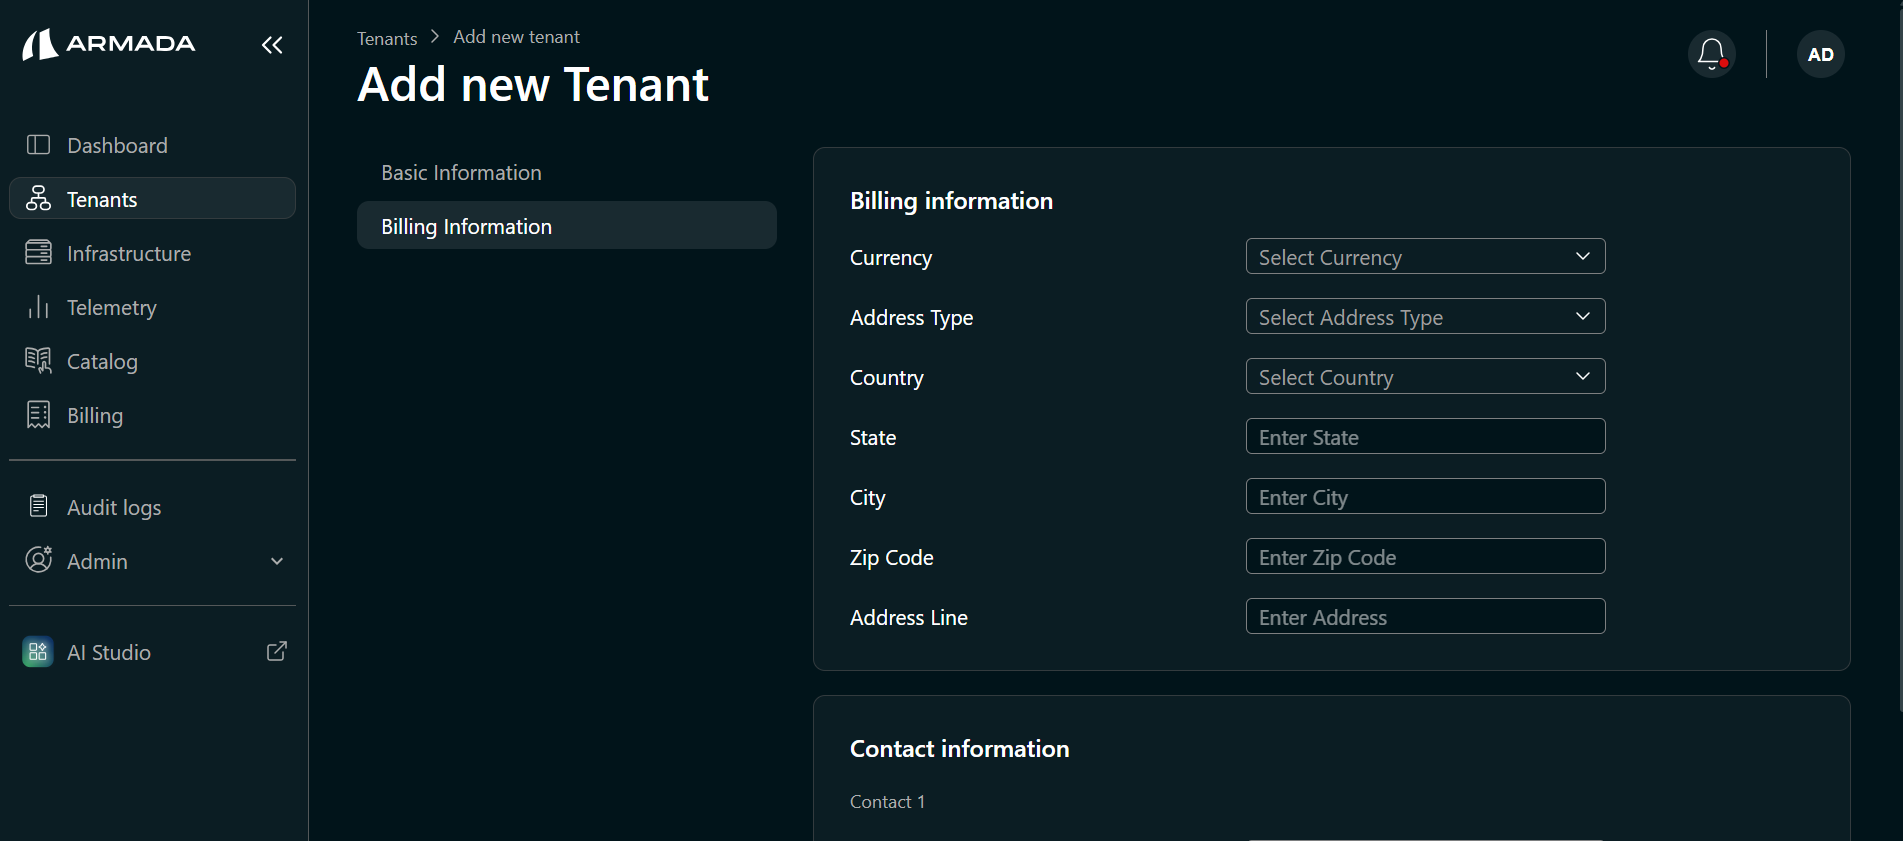
- Enter the Billing Information and Contact Information.
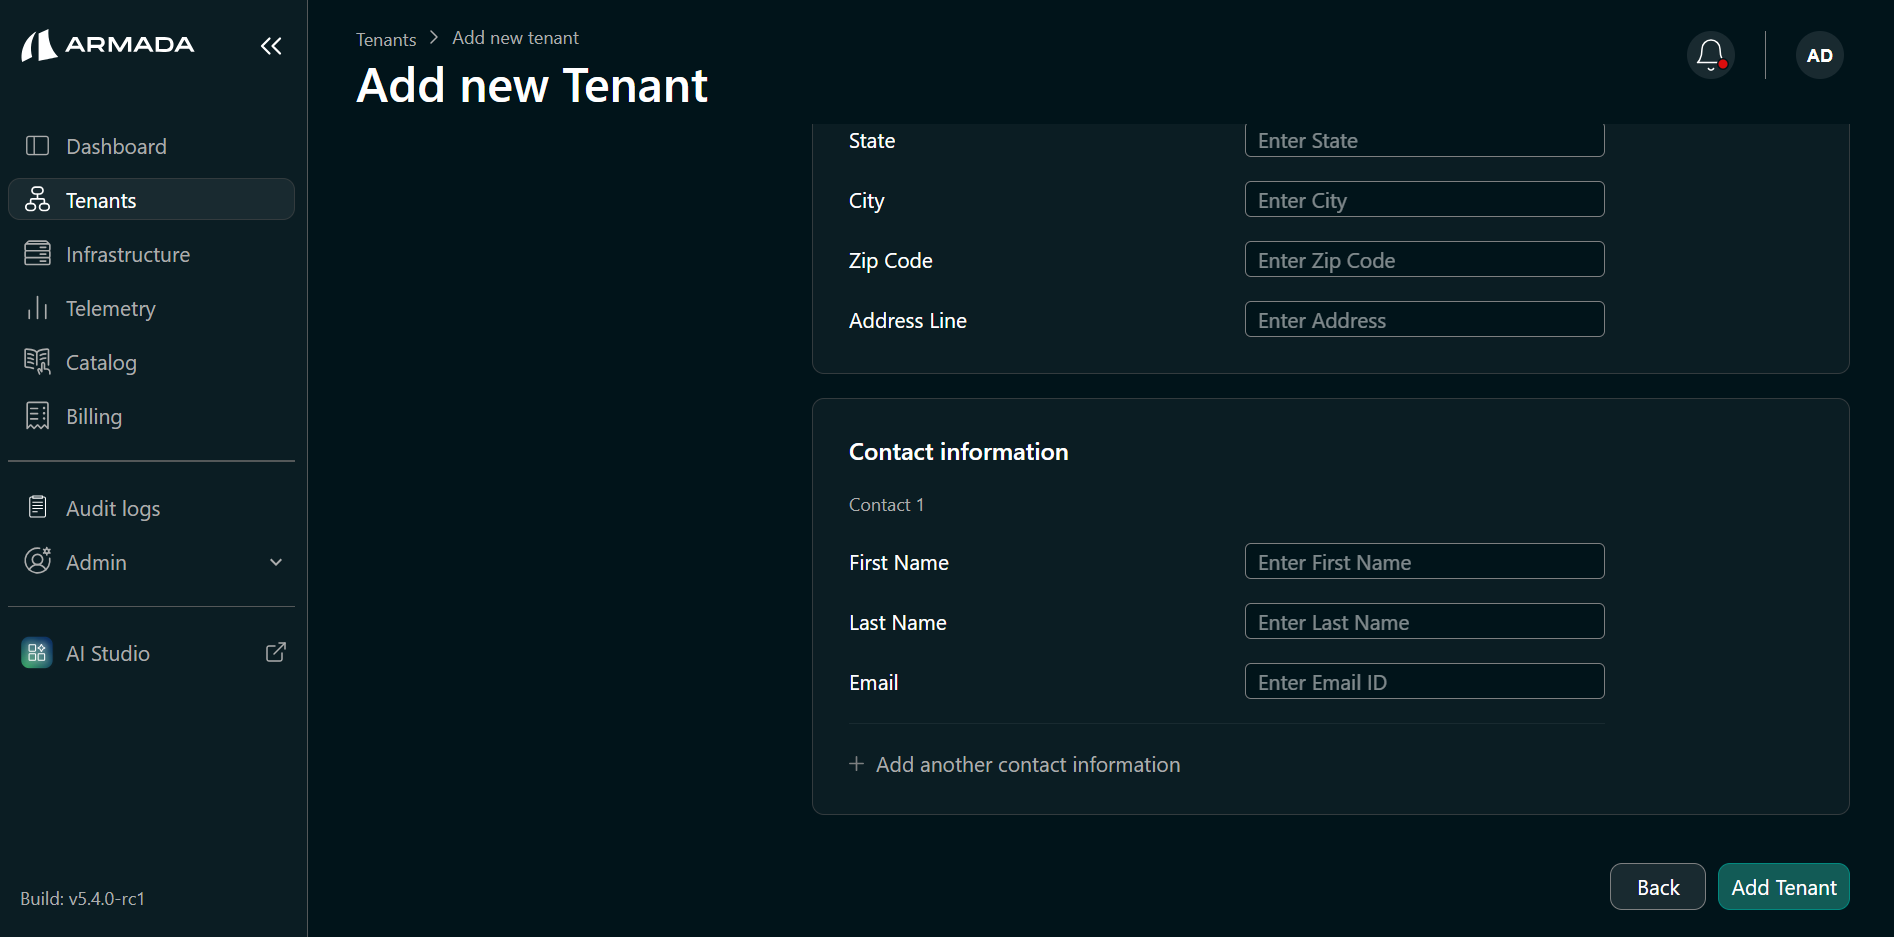
- Click Add Tenant.The tenant status shows Processing while Bridge provisions the tenant environment.
- When the status changes to Success, the tenant is ready.
Next Steps
- Configure tenant quota and pricing — Set resource limits and pricing before the Tenant Admin can allocate compute resources.
- Create a Tenant Admin user — Create a Tenant Admin account so the tenant can begin operations.