OpenShift Cluster
Overview
Bridge supports Red Hat OpenShift as a Kubernetes distribution alongside upstream Kubernetes. OpenShift clusters are created and managed through the same cluster workflow, with OpenShift-specific configuration — including an OpenShift version selector, base domain, and a Red Hat pull secret for image registry access.
This page covers:
- Creating an OpenShift cluster
- Monitoring cluster creation and accessing the cluster
- Onboarding an existing external OpenShift cluster
Prerequisites
- Tenant Admin access — Log in as a Tenant Admin to create or onboard clusters.
- Compute resources — Bare Metal resources allocated to your tenant.
- Red Hat Pull Secret — Required to pull OpenShift images from the Red Hat registry. Obtain your pull secret from Red Hat Cloud Console.
Create an OpenShift Cluster
Step 1: Start Cluster Creation
- Log in to Bridge as a Tenant Admin.
- In the left sidebar, open Compute → Cluster.
- Click Create Cluster.
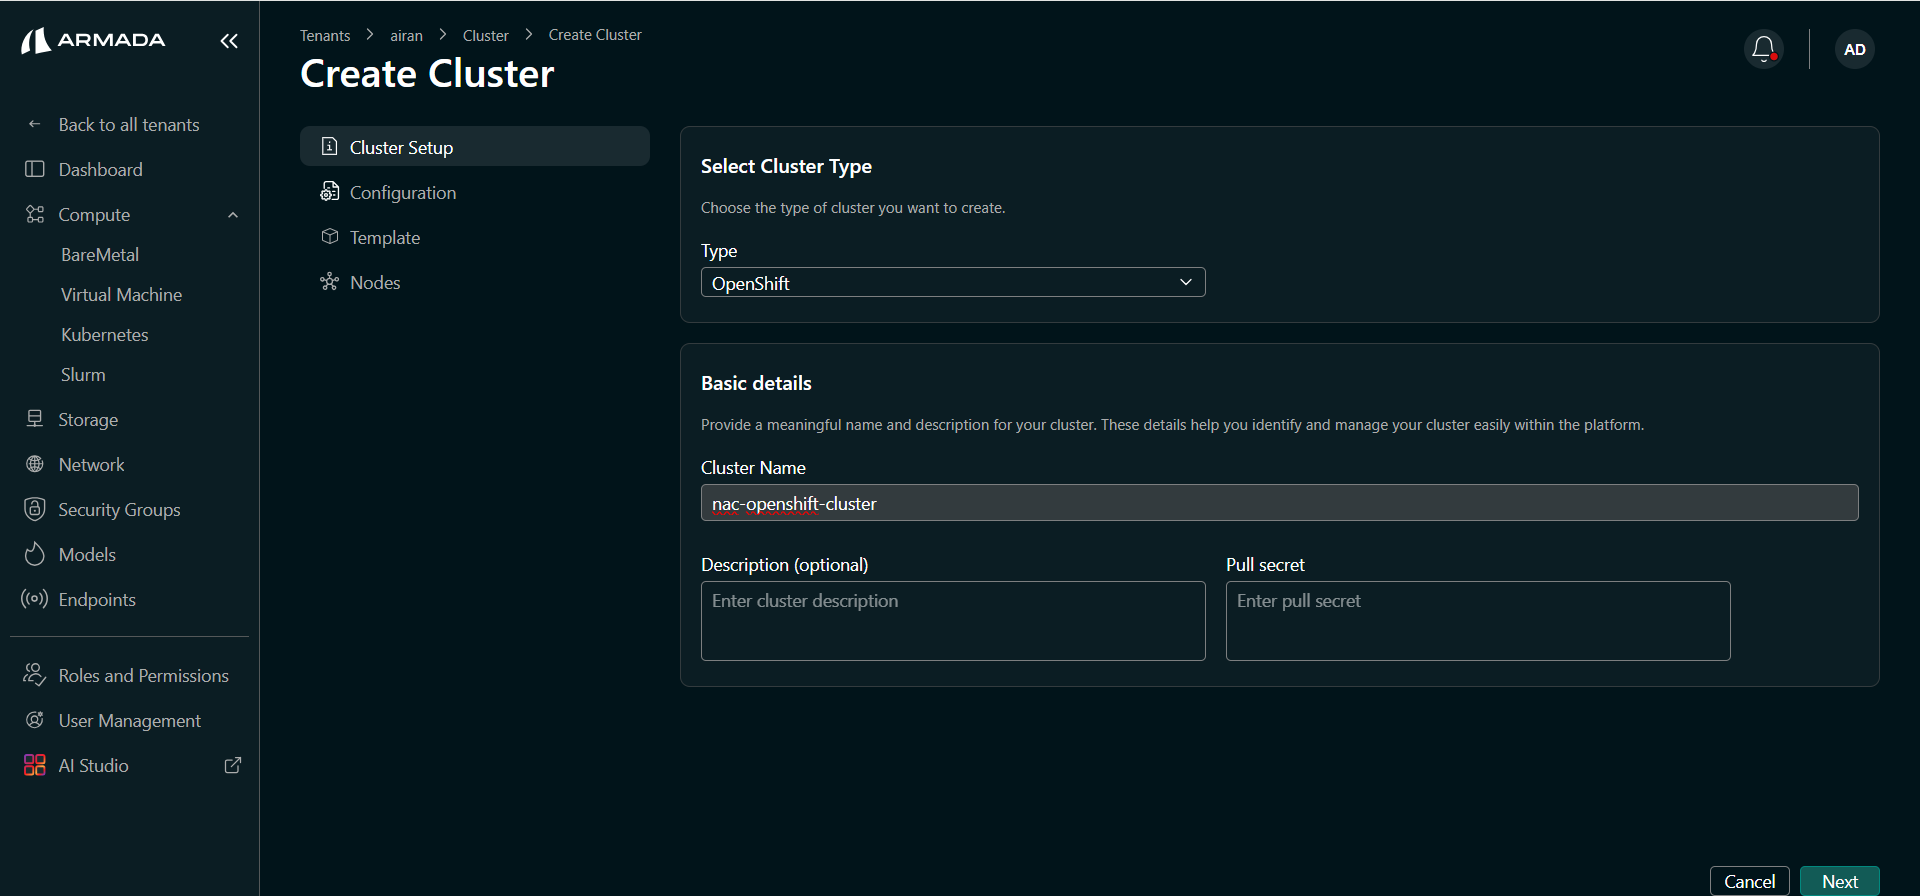
Step 2: Configure Cluster Setup
- Set Type to OpenShift from the dropdown.
- Enter a Cluster Name (e.g.,
nac-openshift-cluster). - Optionally enter a Description.
- Paste your Pull Secret — the JSON-format authentication token from your Red Hat account. This is required for OpenShift to pull images from the Red Hat registry.
- Click Next.
The pull secret is a JSON object obtained from the Red Hat Hybrid Cloud Console. It contains authentication credentials for registry.redhat.io, quay.io, and other Red Hat registries.
Step 3: Configure OpenShift Version and Domain
- Select the OpenShift Version from the dropdown (supported: 4.18).
- Enter the Base Domain for the cluster (e.g.,
nac-cluster.openshift.clusters). This is used to generate the cluster's API and console endpoints. - Toggle Install NVIDIA GPU tools on if you want NVIDIA GPU tooling installed on the cluster.
- Click Next.

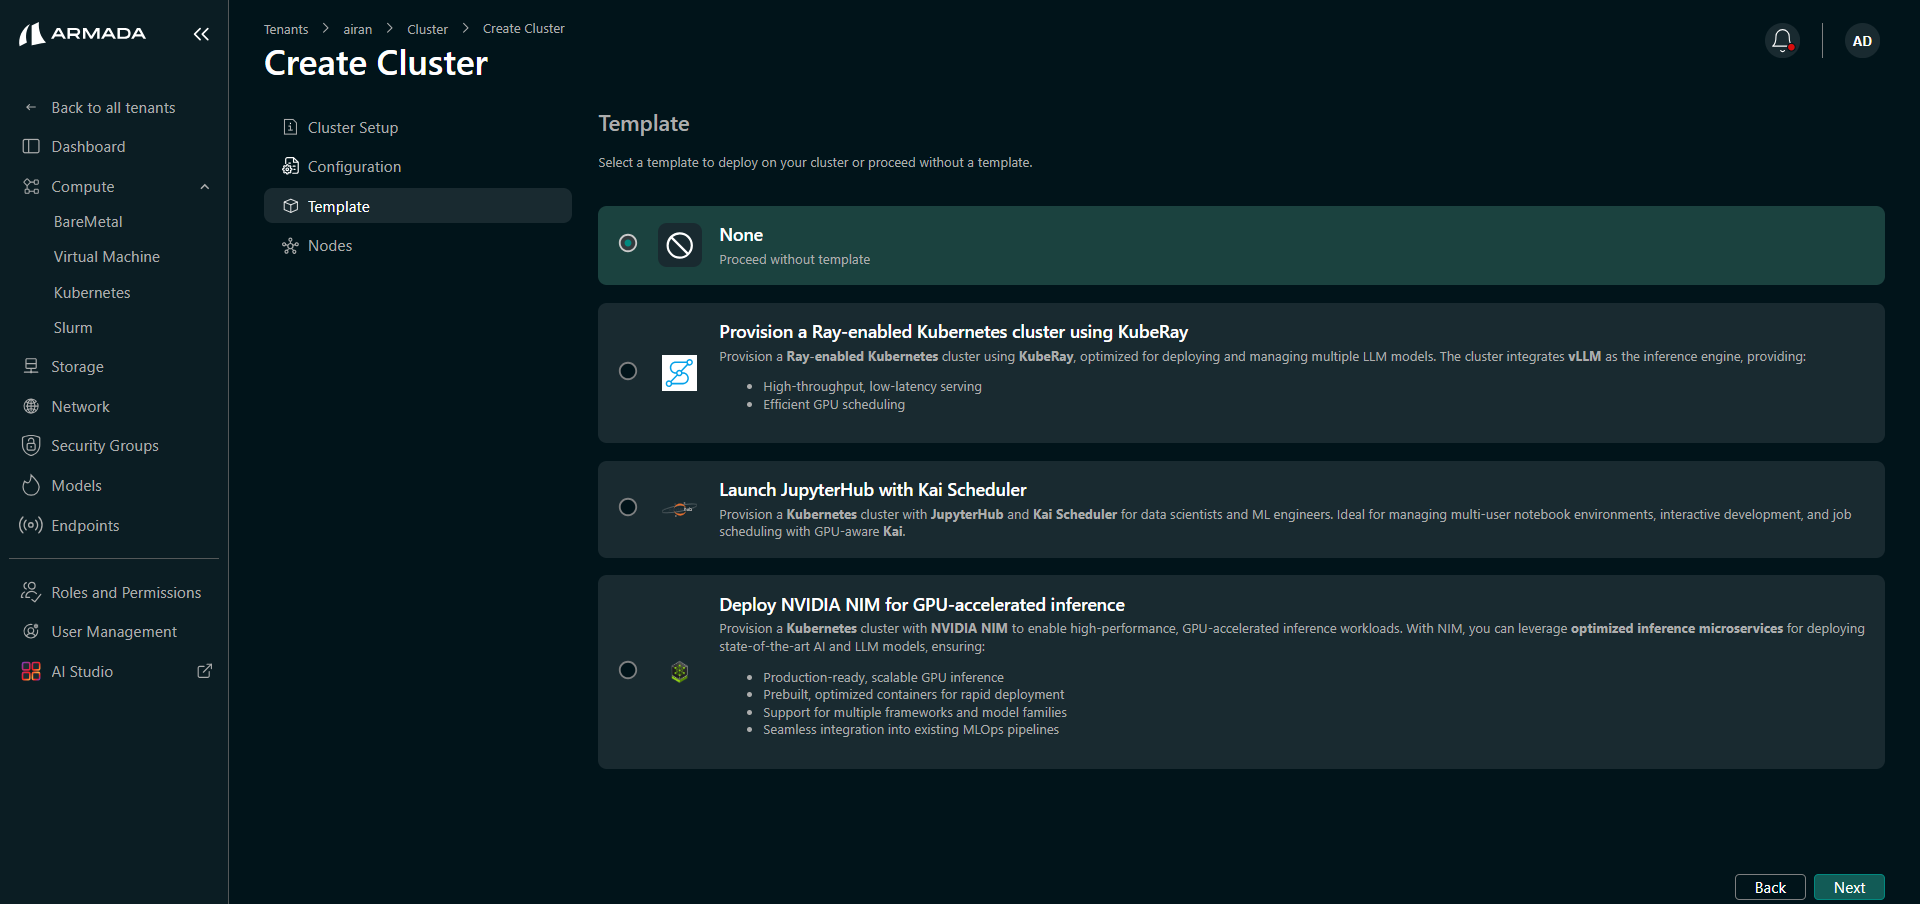
Step 4: Select a Cluster Template
Select the template that matches your workload requirements. The same templates available for standard Kubernetes are supported for OpenShift:
| Template | Use case |
|---|---|
| None | Plain OpenShift cluster with no additional stack. |
| Ray-Enabled | OpenShift cluster with KubeRay for distributed computing workloads. |
| JupyterHub with KAI Scheduler | JupyterHub and KAI Scheduler for interactive notebooks and job scheduling. |
| NVIDIA NIM | NVIDIA NIM for high-performance GPU-accelerated inference. |
Click Next after selecting a template.
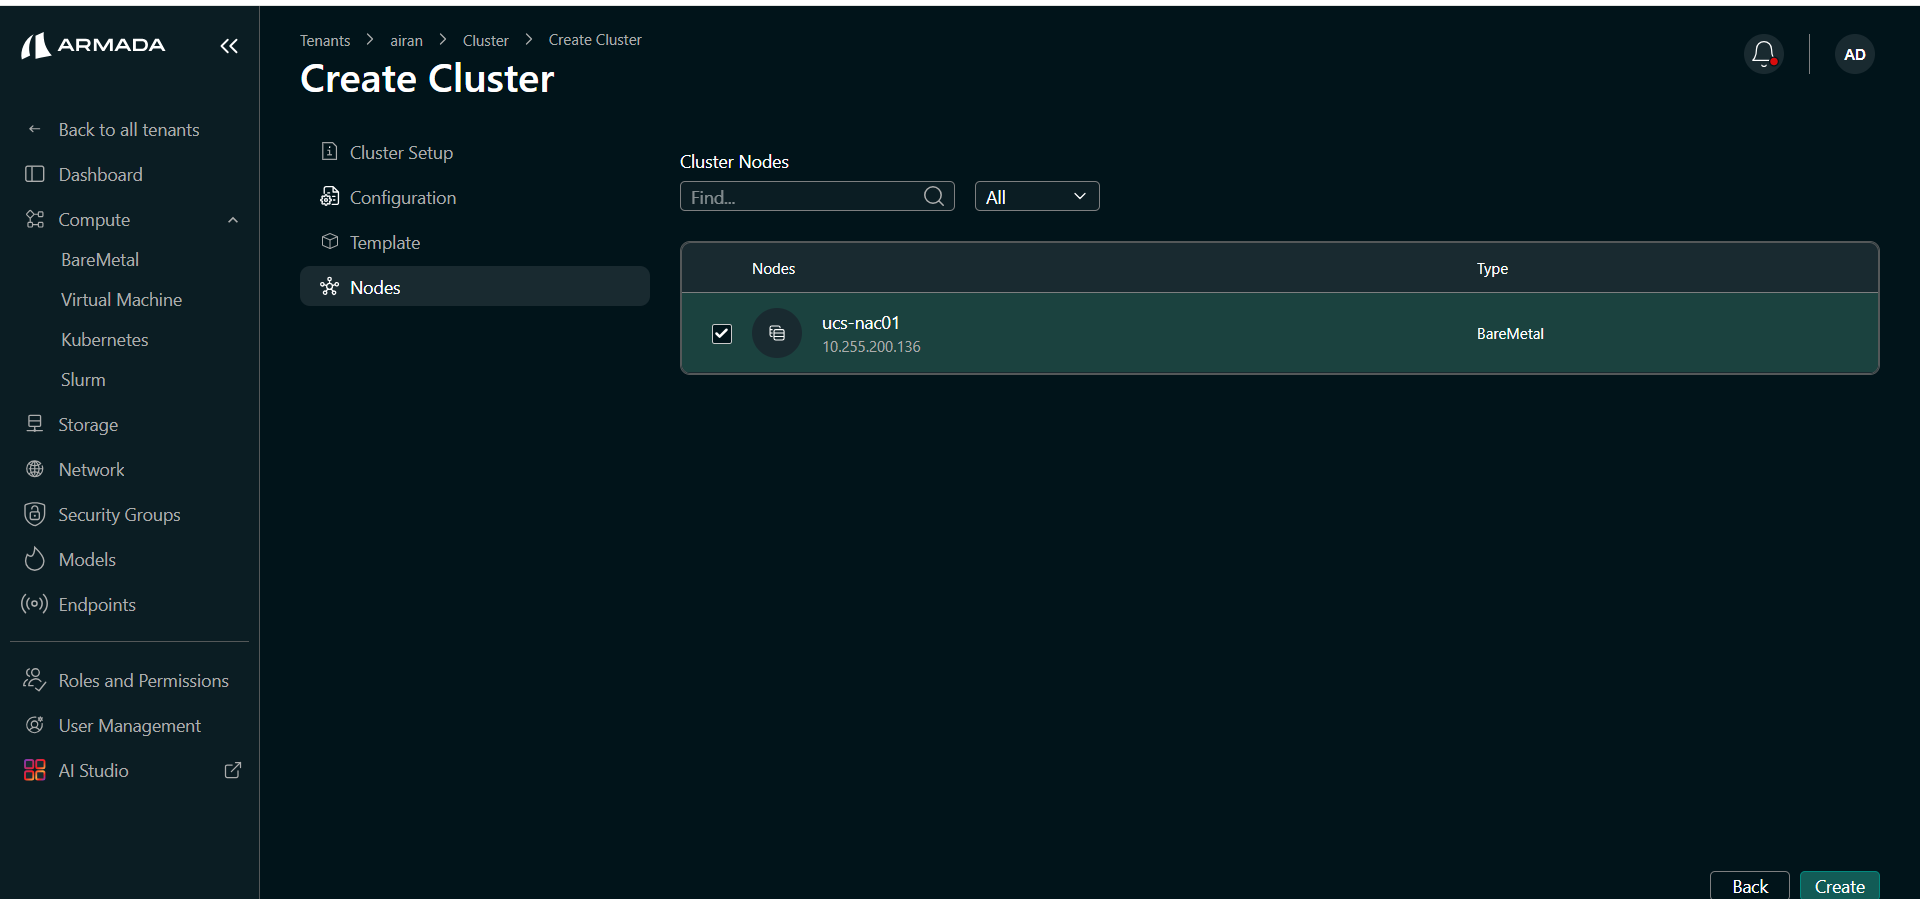
Step 5: Select Nodes
- Select the Bare Metal nodes to assign to the cluster from the available node pool.
- Click Create to start cluster provisioning.
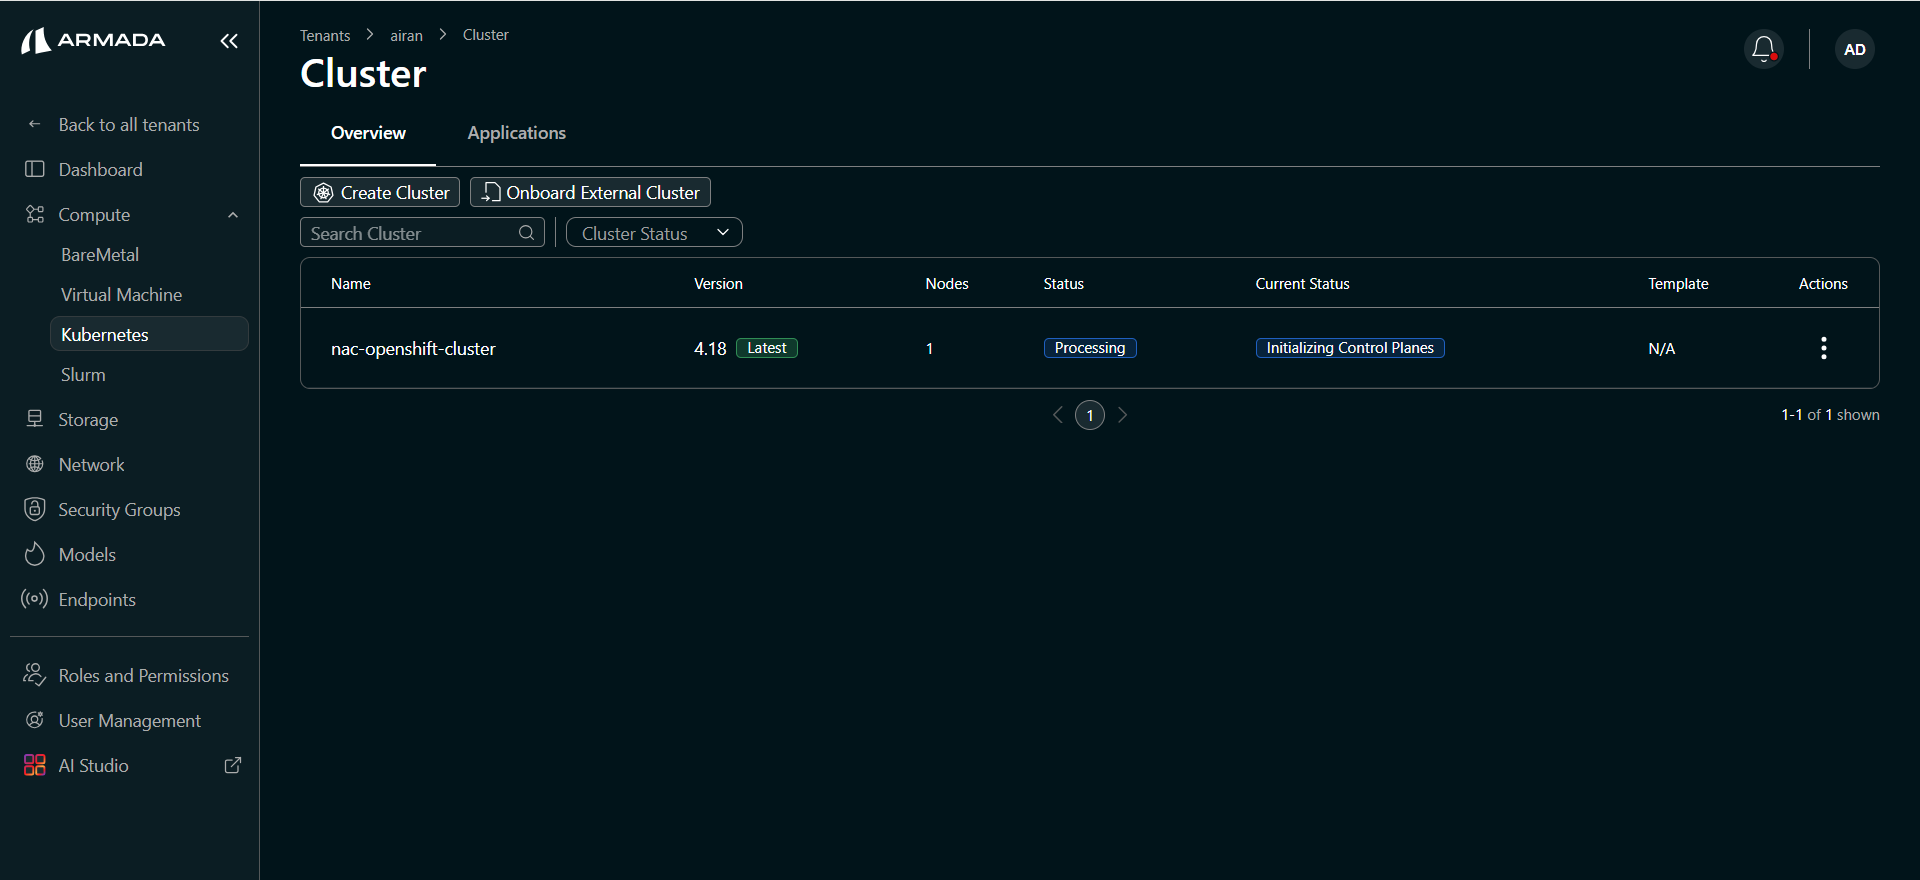
Monitor Cluster Creation
Cluster creation progresses through the following states. Wait until the status shows Running.
| Status | Description |
|---|---|
| Processing | Cluster provisioning has started. |
| Initializing: Control Plane | OpenShift control plane is being set up. |
| Running | Cluster is fully provisioned and ready for workloads. |
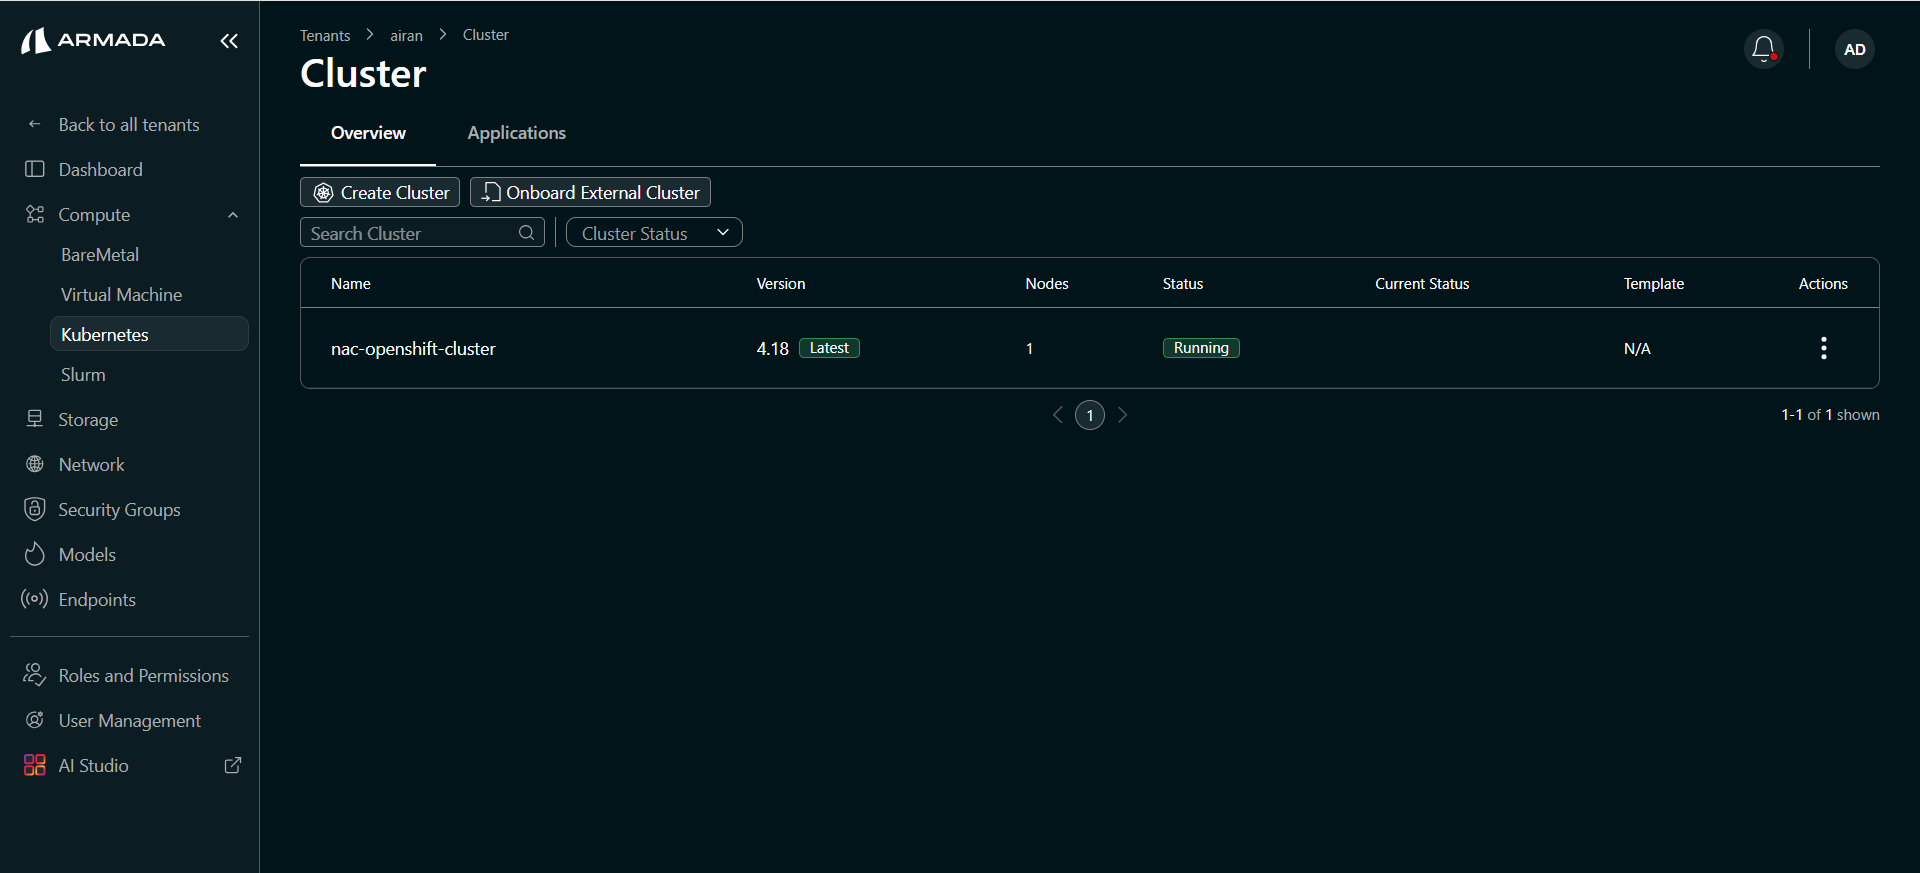
Access the Cluster
Once the cluster is Running, click the cluster name to open the cluster detail view.
Overview Tab
The Overview tab shows cluster details and available actions.
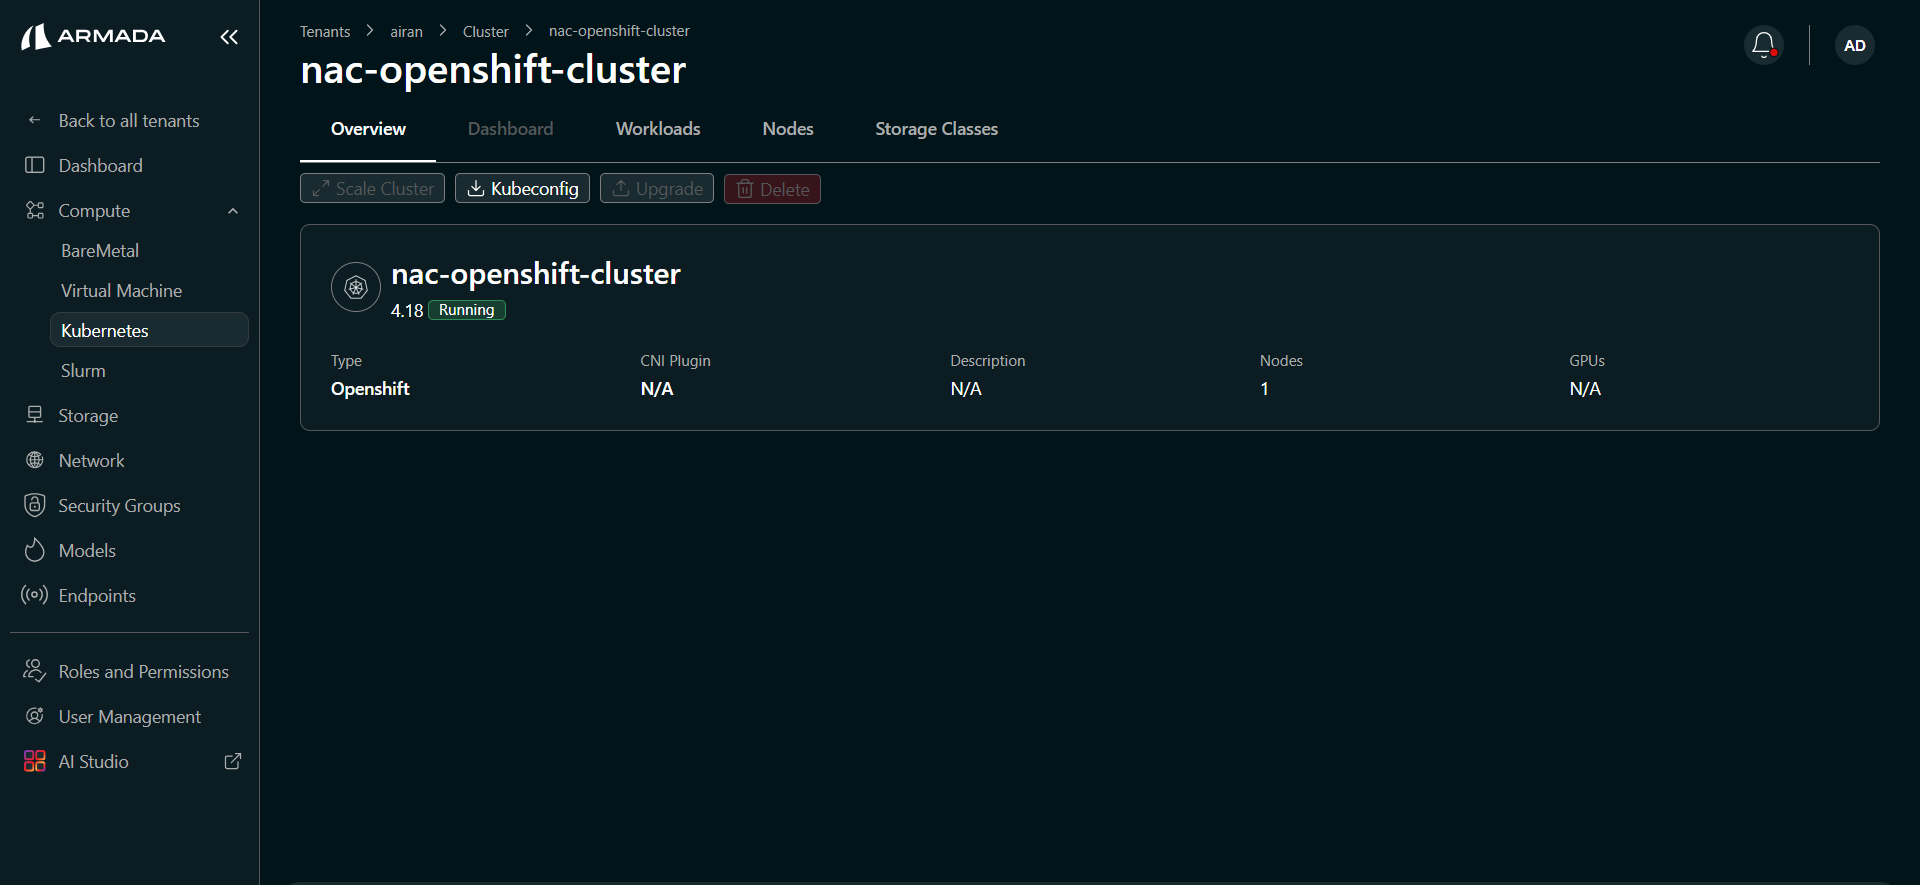
| Field | Description |
|---|---|
| Type | OpenShift |
| Status | Running |
| CNI Plugin | Network plugin used by the cluster |
| Nodes | Number of nodes allocated |
| GPUs | GPU resources assigned to the cluster |
Available actions:
- Pause Cluster — Suspend the cluster without deleting it.
- Kubeconfig — Download the kubeconfig file to access the cluster from your local machine or external tools.
- Connect — Open the cluster console.
- Delete — Permanently remove the cluster.
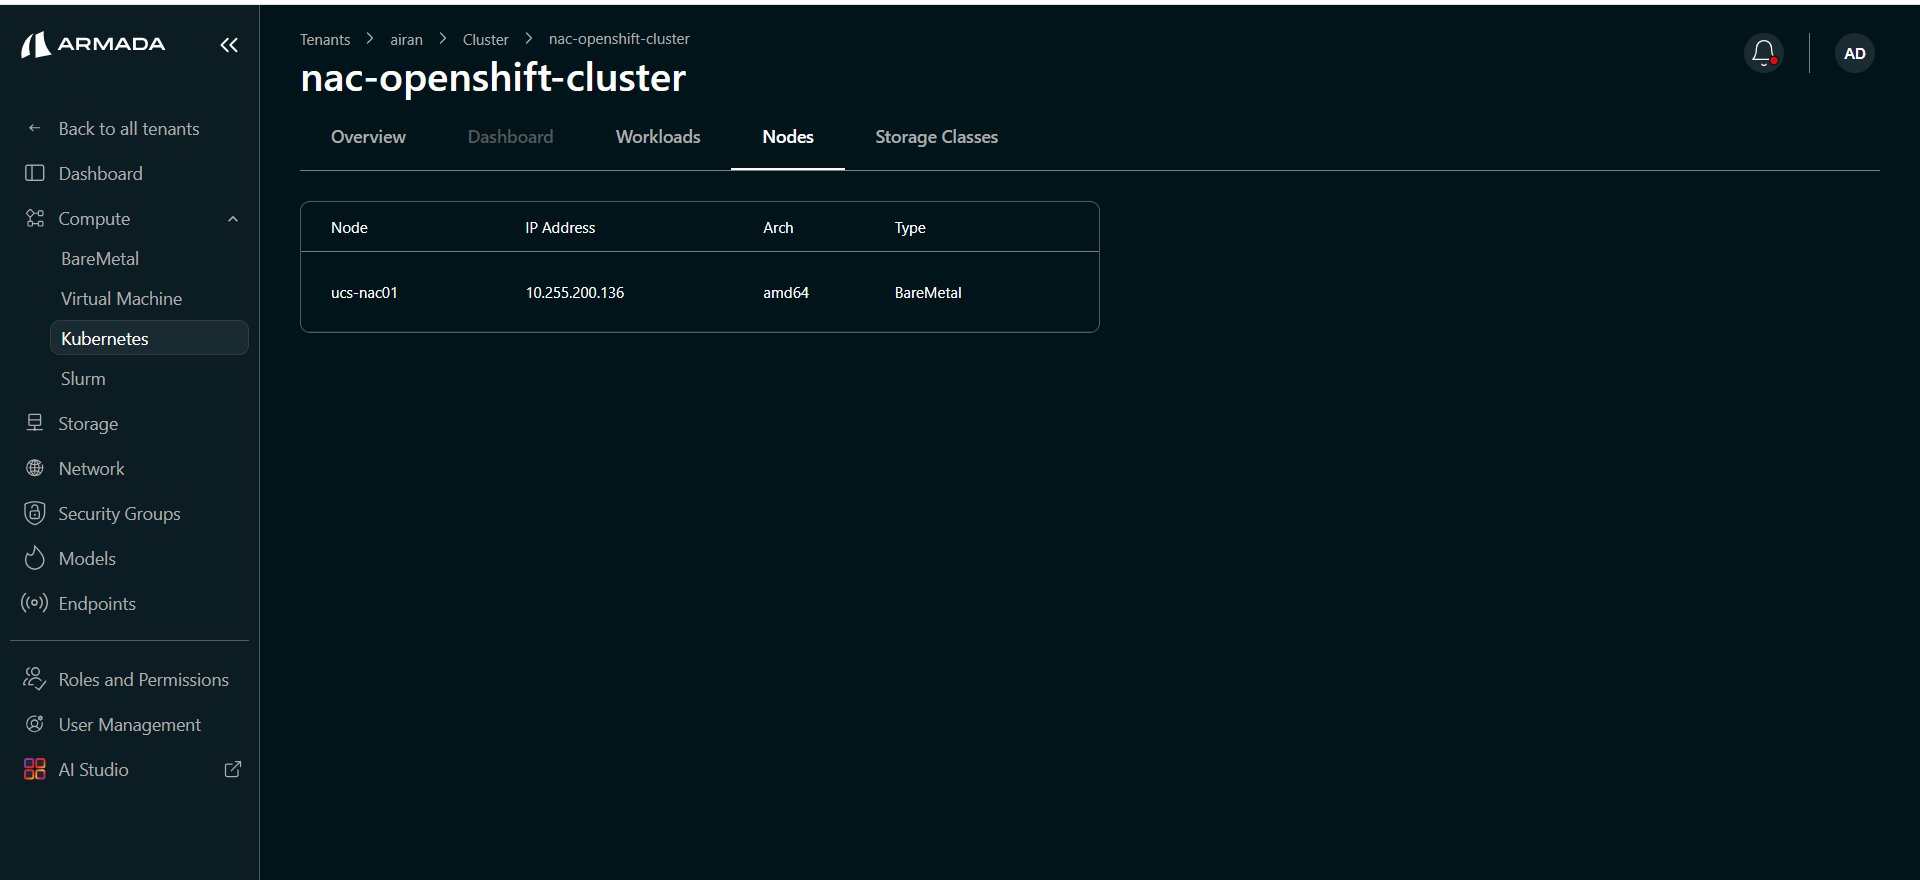
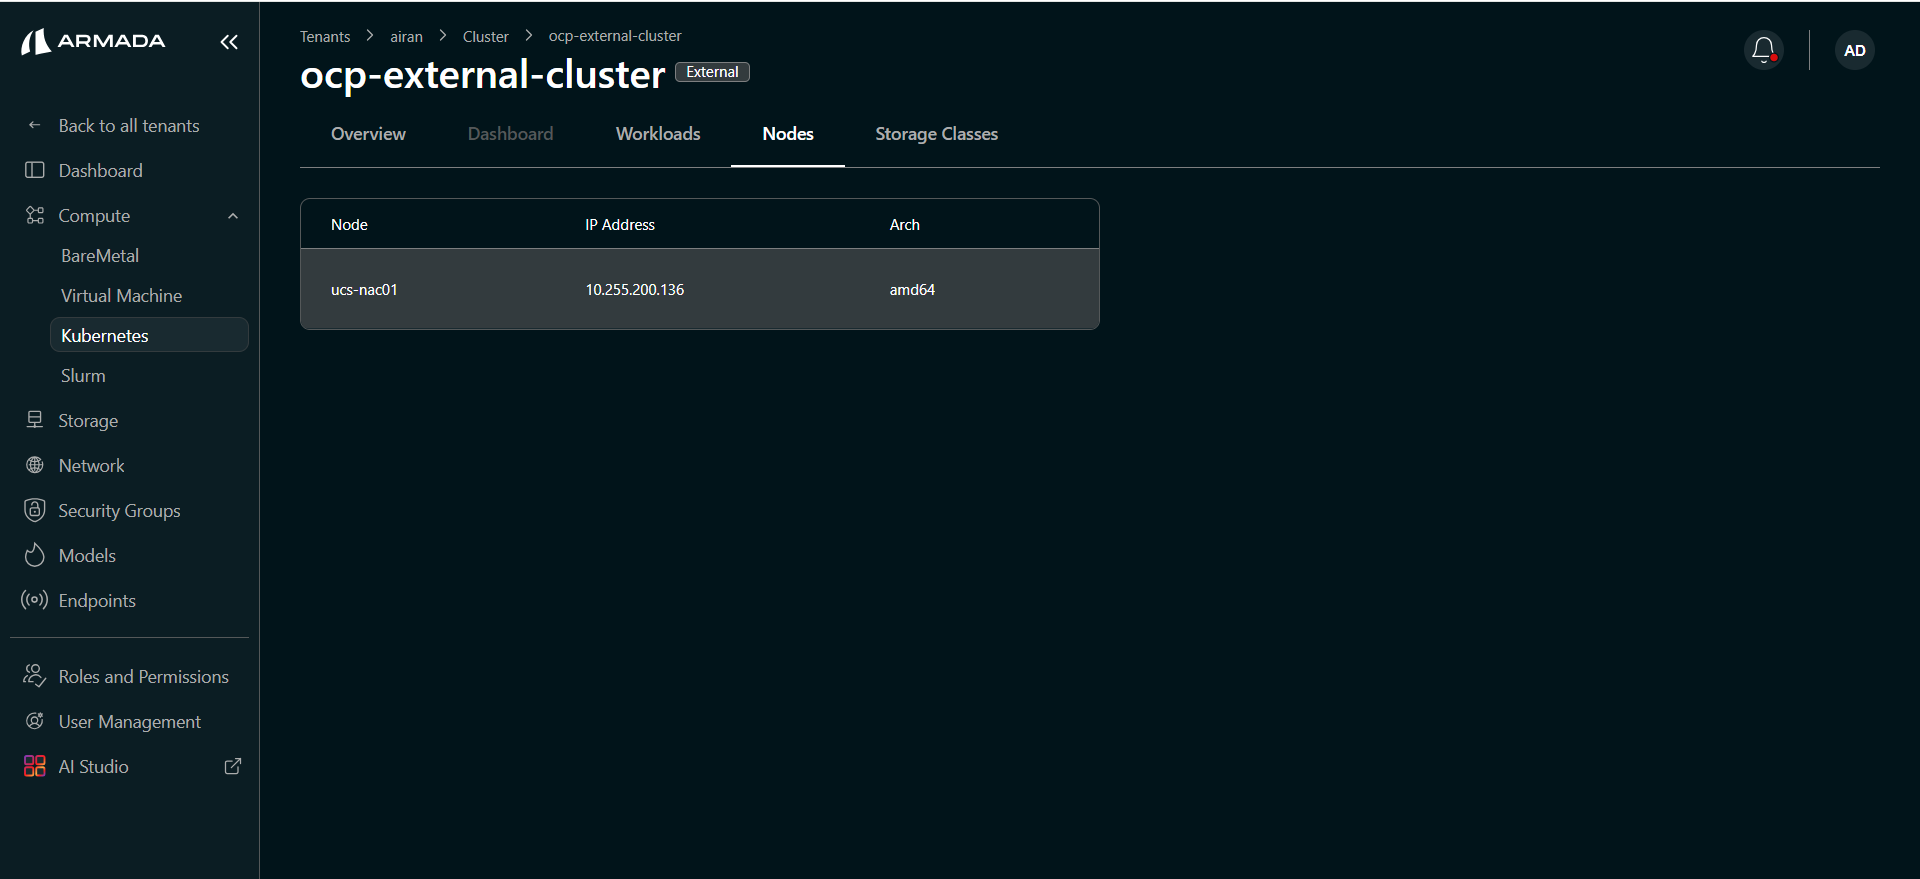
Nodes Tab
The Nodes tab lists all nodes assigned to the cluster — hostname, IP address, architecture, and type (BareMetal).
Kubectl Terminal
Click the Kubectl Terminal tab to open an in-browser terminal connected to the OpenShift cluster. You can run kubectl or oc commands directly from Bridge UI without needing a separate terminal session.
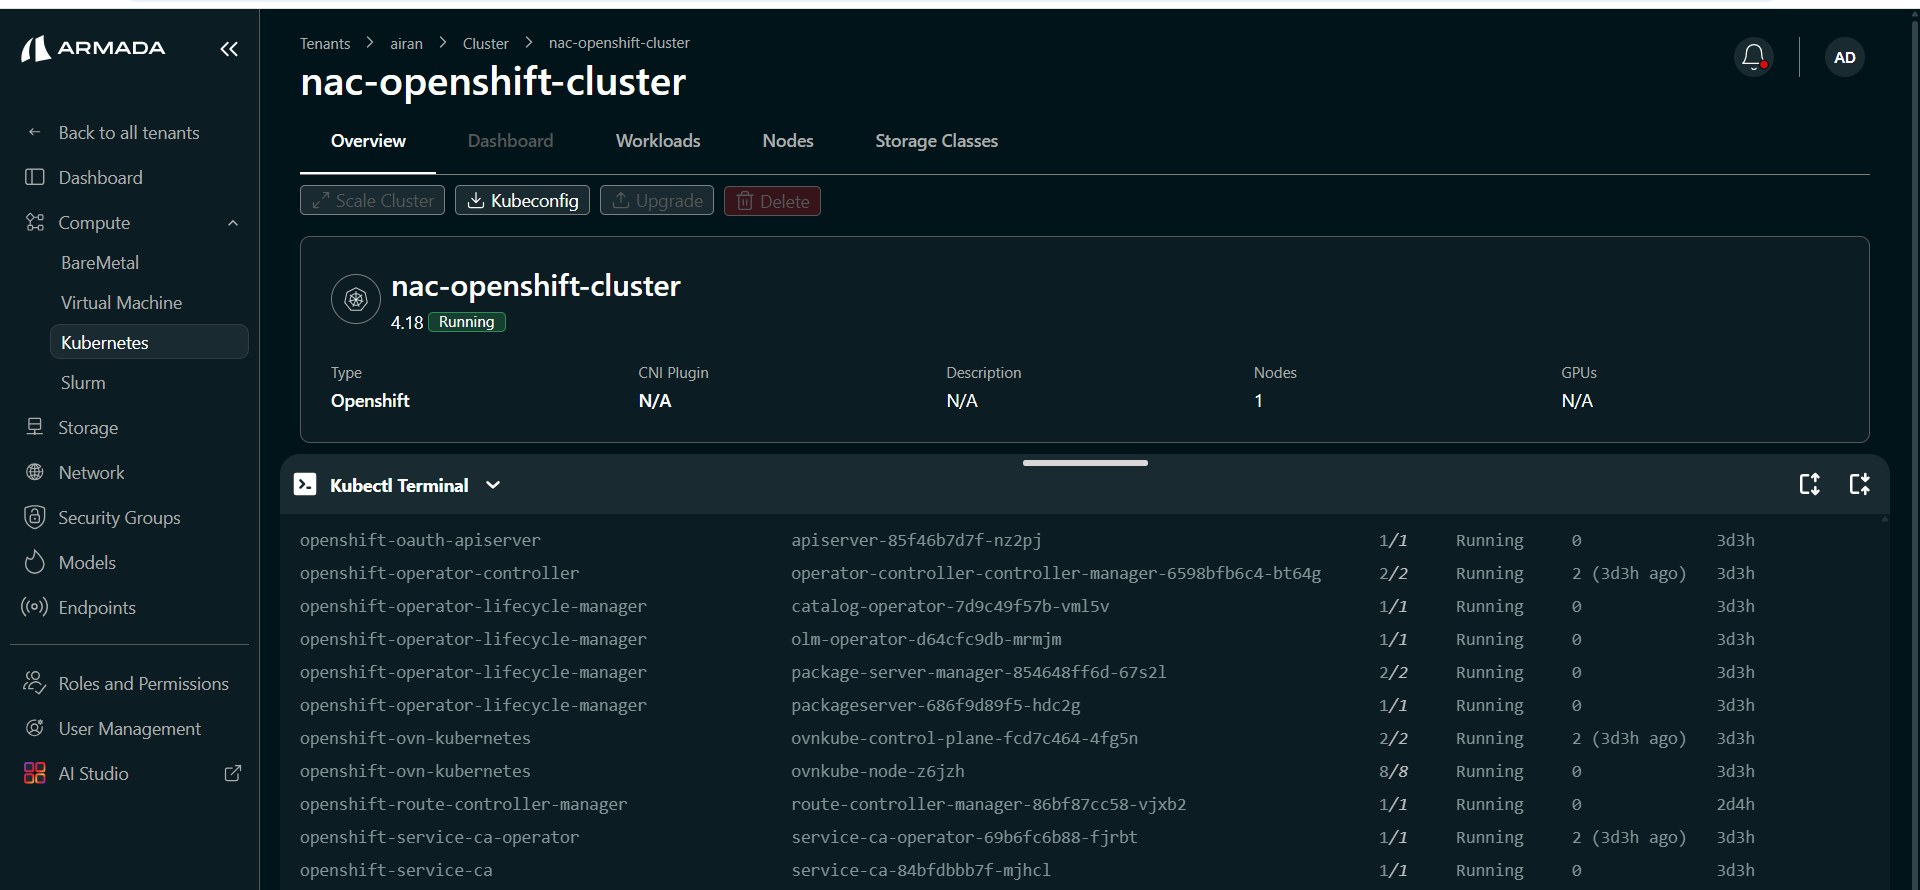
To verify the cluster is healthy, run:
kubectl get pods -A
OpenShift-specific system pods you will see include:
openshift-ovn-kubernetes— OVN-Kubernetes CNI networkingopenshift-operator-lifecycle-manager— Operator Lifecycle Manageropenshift-network-operator— Network operatoropenshift-route-controller— Route controller manageropenshift-service-ca— Service CA operator
Ensure all pods are in Running state before deploying workloads.
Onboard an External OpenShift Cluster
You can onboard an existing OpenShift cluster managed outside of Bridge and bring it under Bridge management.
Step 1: Open Onboard Dialog
- In the left sidebar, open Compute → Cluster.
- Click Onboard External Cluster.
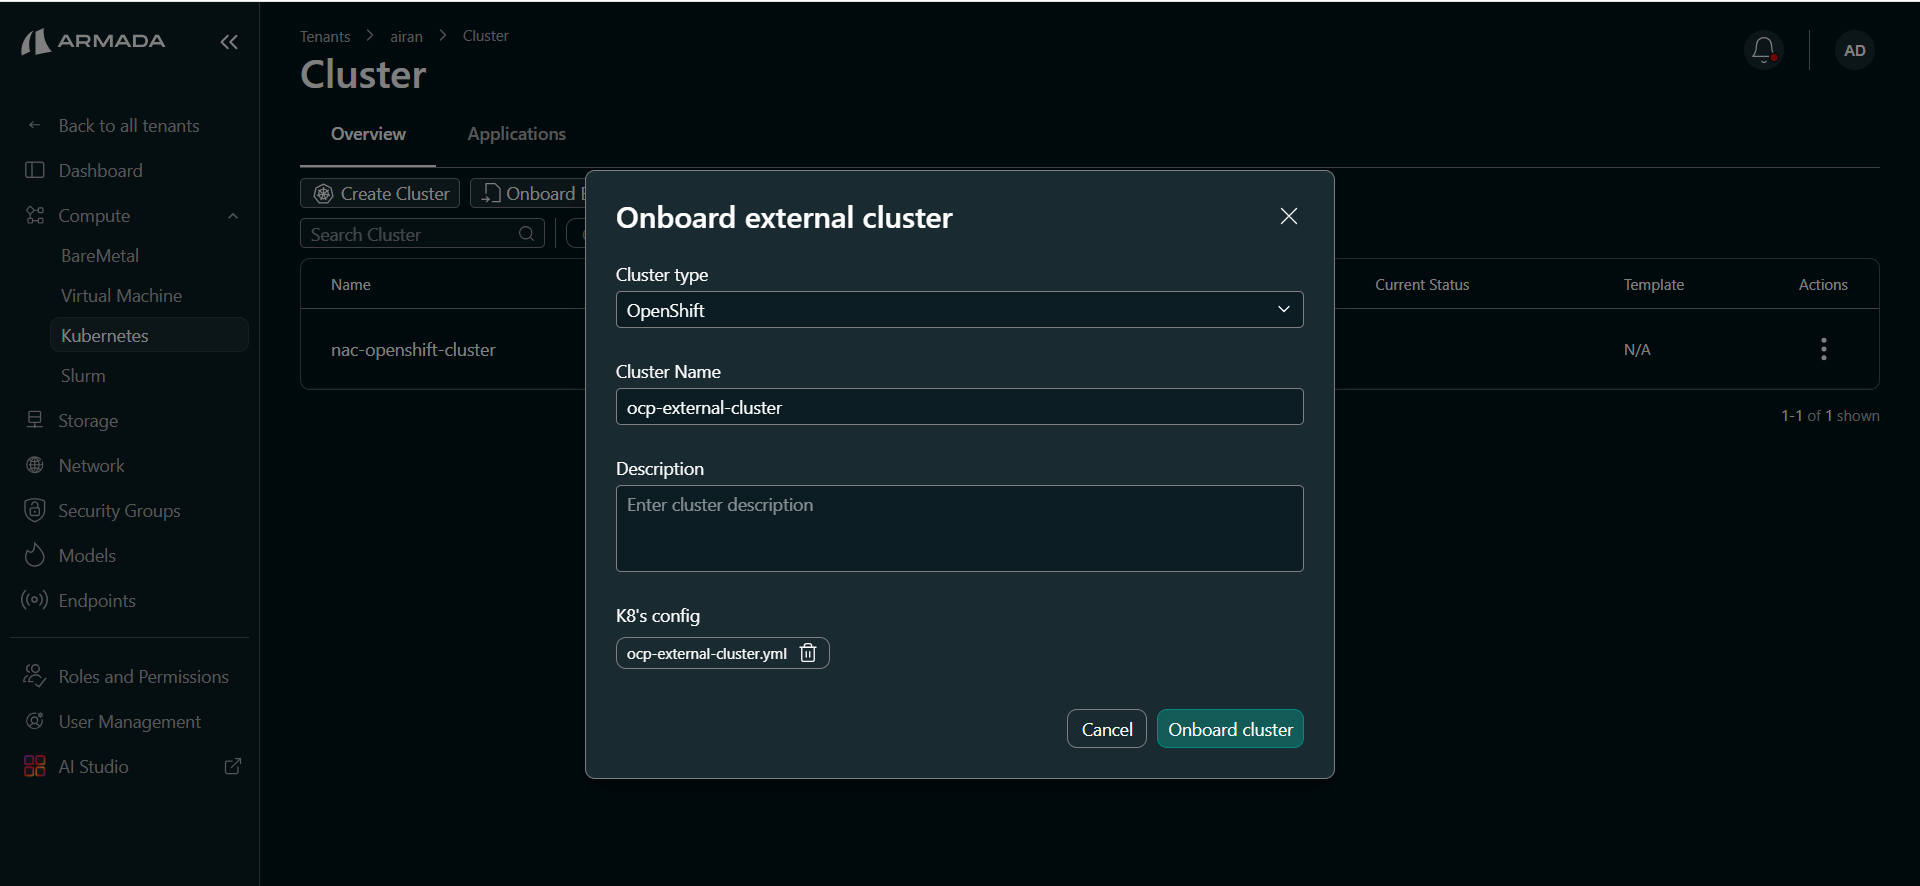
Step 2: Configure the External Cluster
- Set Cluster type to OpenShift.
- Enter a Cluster Name (e.g.,
ocp-external-cluster). - Optionally enter a Description.
- Upload the K8s Config (kubeconfig file) for the external cluster.
- Click Onboard cluster.
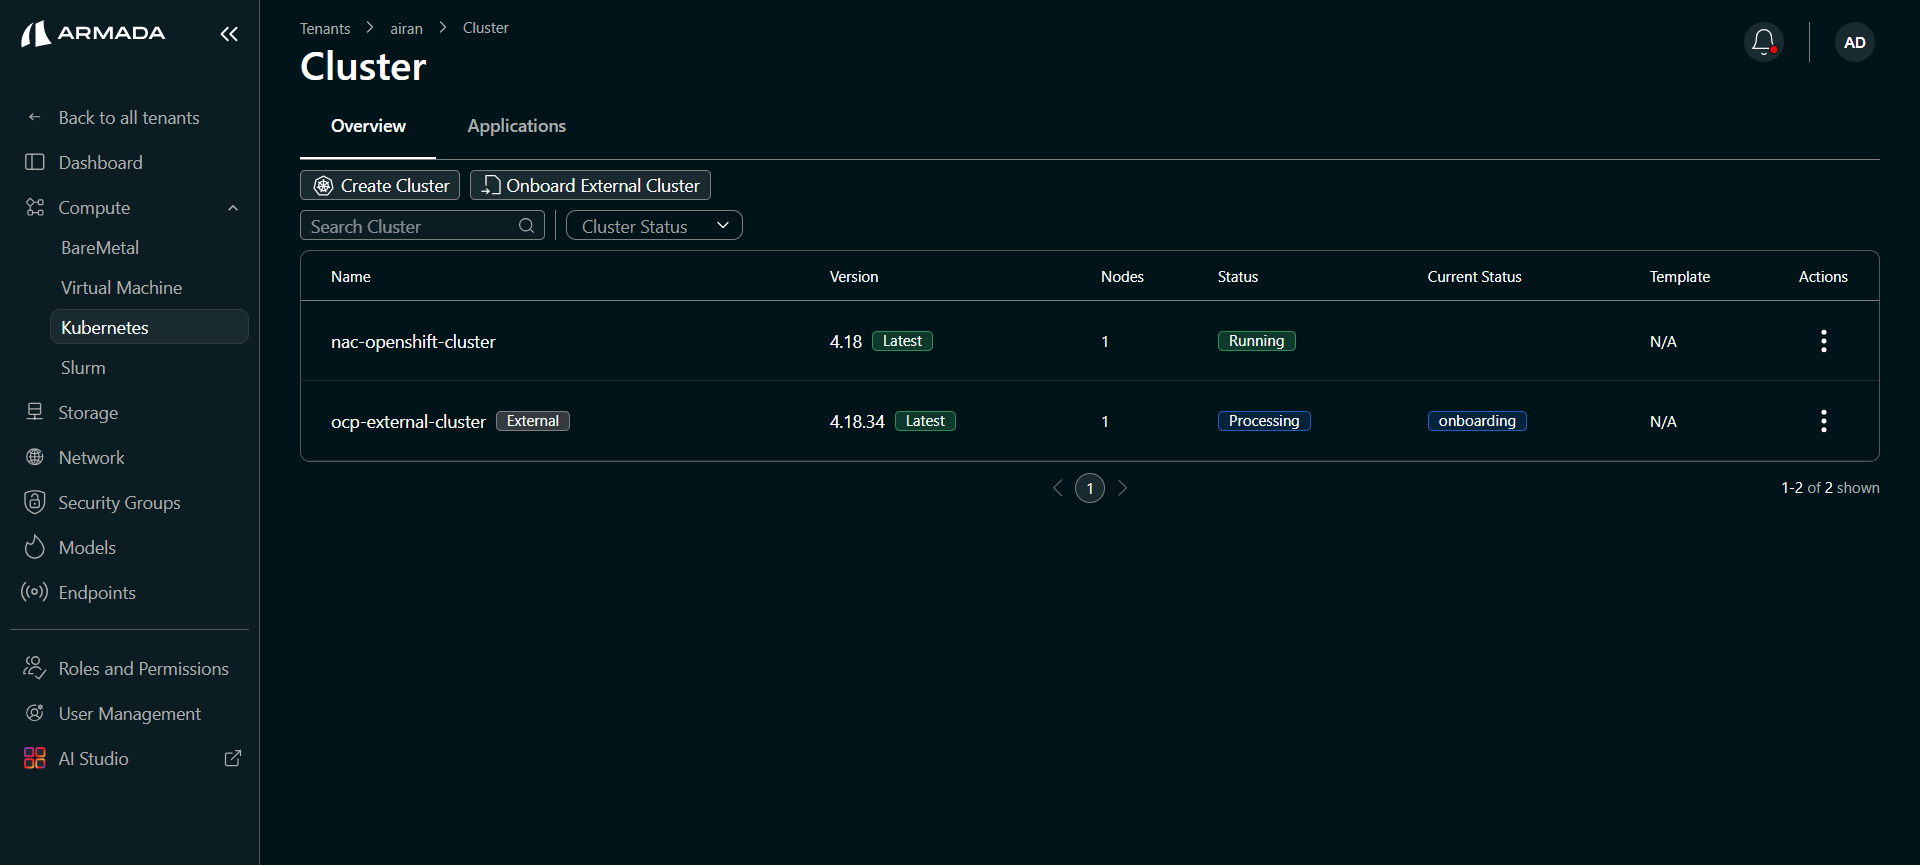
Step 3: Monitor Onboarding
The cluster appears in the list with an External badge. Wait for the status to reach Running.
External Cluster Detail
Once onboarded, click the cluster name to view the external cluster detail. The External badge is shown next to the cluster name.
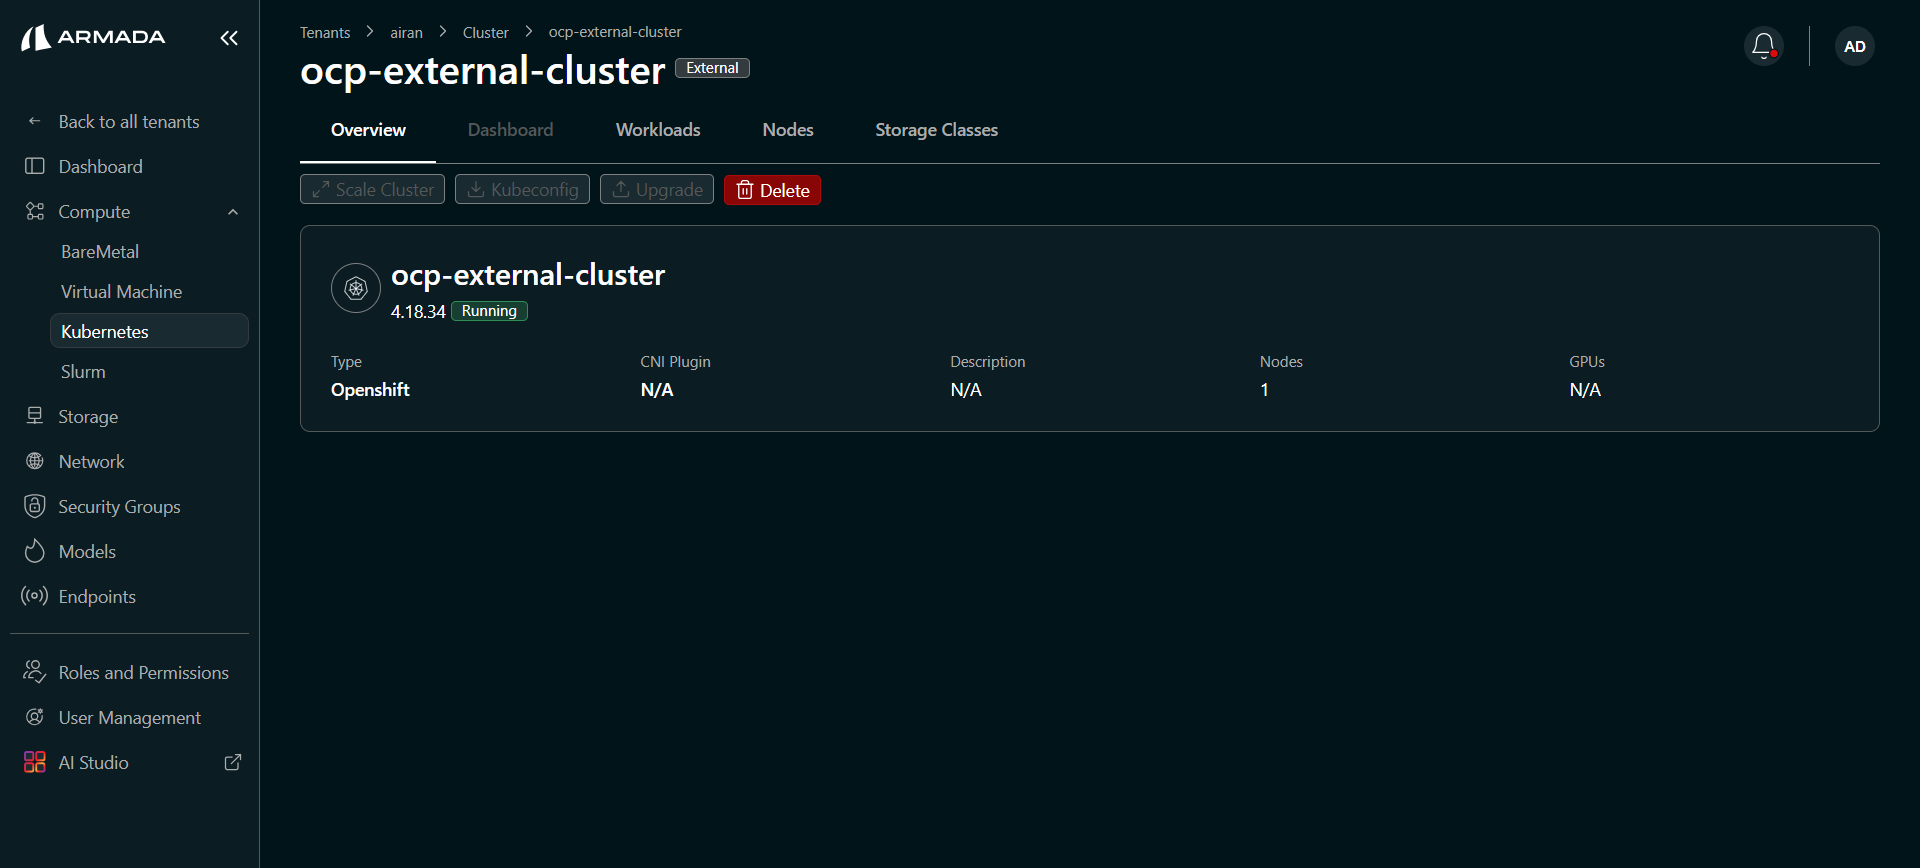
Available actions for external clusters:
| Action | Description |
|---|---|
| Share Cluster | Share access to the cluster with other tenants or users. |
| Kubeconfig | Download the kubeconfig for external access. |
| Connect | Open the cluster console. |
| Delete | Remove the cluster from Bridge management. |
The Nodes tab shows the nodes registered from the external cluster.
Deleting an external cluster removes it from Bridge management only. The underlying cluster infrastructure is not affected.
Delete a Cluster
- In the cluster detail view or cluster list, click Delete.
- In the confirmation dialog, type the cluster name exactly to confirm deletion.
- Click Delete. The cluster status changes to Deleting.
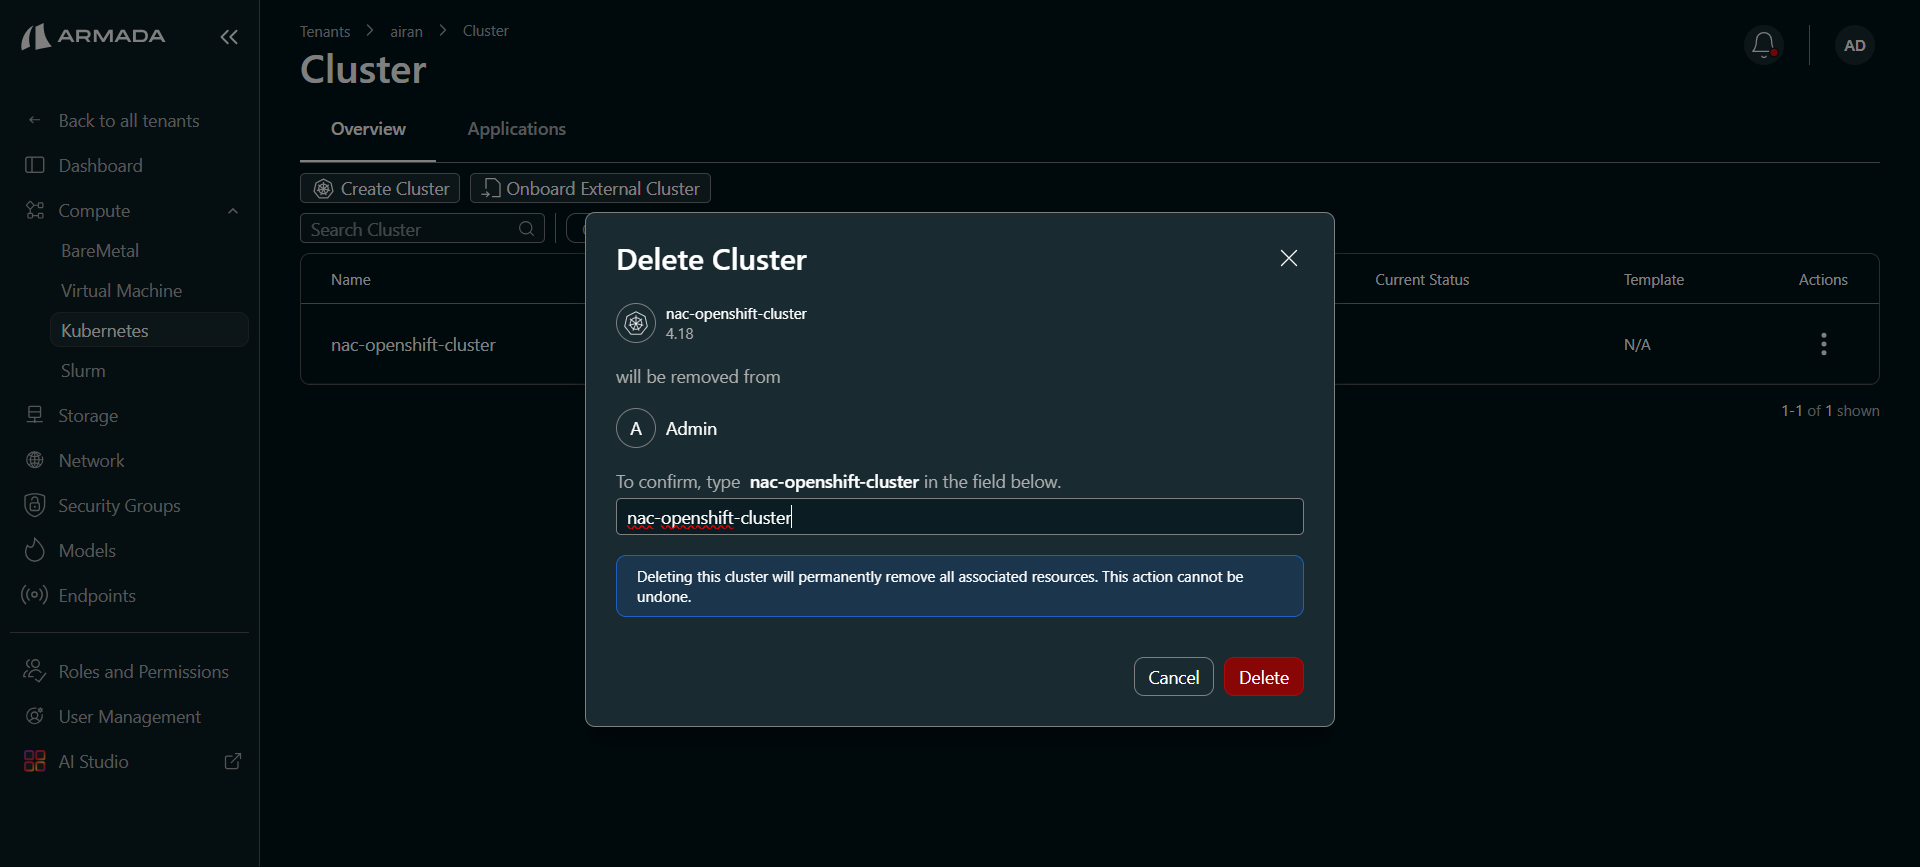
Deleting a cluster permanently removes all associated resources. This action cannot be undone.
Next Steps
- Cluster Templates — Learn about available cluster templates.
- Cluster Scaling — Scale cluster nodes up or down.
- Cluster Dashboard — Open the cluster view and use the Kubectl Terminal from Bridge UI.